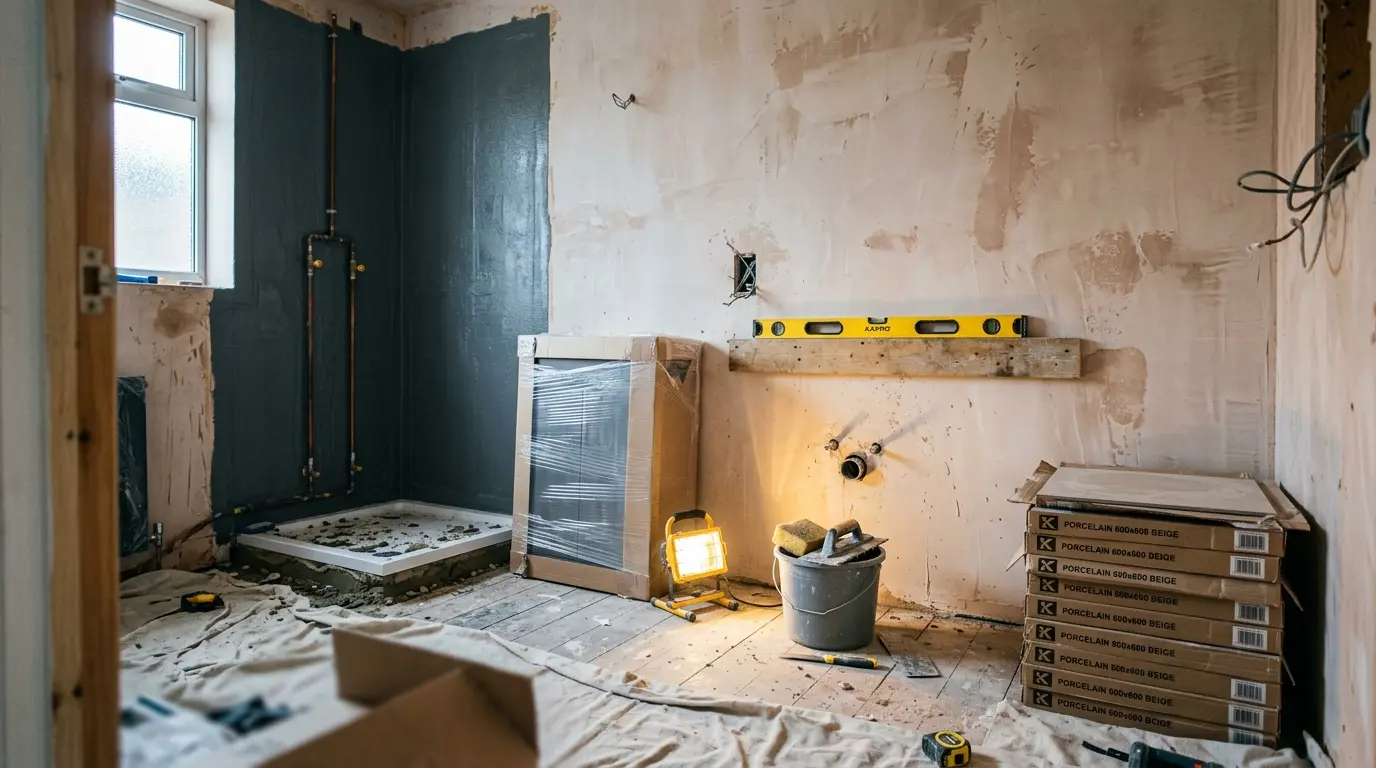
How to Renovate a Bathroom Step by Step

To renovate a bathroom, plan the scope and budget, order key products, strip out the old suite, then complete first-fix plumbing and electrics, plastering, waterproofing, tiling, fixtures and final decoration in that order. A straightforward job takes about two to six weeks on site, plus planning and lead times. Sequence matters more than speed.
Most delays on a bathroom project have little to do with the building work. They come from a shower screen that arrives weeks late, a vanity ordered after the plumber has finished, or a ceiling found damaged once the old tiles come off. One homeowner’s renovation took about six months for exactly those reasons. This bathroom renovation guide puts the stages in the right order, so each trade arrives when the room is ready.
How Do You Renovate a Bathroom Step by Step?
Renovate a bathroom in eight stages: plan and order, strip out, first fix, board and waterproof, tile, fit fixtures, decorate, then snag. Baths and shower trays go in before wall tiling, while toilets, basins and taps come after. Each stage must finish, and dry where needed, before the next trade starts.
These bathroom remodel steps assume a full strip-out. Times and costs are approximate for a typical UK family bathroom, exclude VAT and products unless stated, and vary by country.
| Stage | Typical time on site | Approx. cost (GBP) | Main trade |
| 1. Plan and order | 2 to 8 weeks beforehand (lead times) | Design fees vary; products separate | You, designer |
| 2. Strip out | 1 to 3 days | £300 to £800 with waste removal | Builder |
| 3. First fix plumbing and electrics | 2 to 5 days | About £1,200 to £1,500 to plumb a bath, basin and WC; about £500 for electrics | Plumber, electrician |
| 4. Board, plaster, waterproof | 3 to 7 days plus drying | Plastering £500 to £750; walk-in shower waterproofing, boarding and plumbing £1,200 to £1,500 | Plasterer, tiler |
| 5. Tile walls and floor | 3 to 7 days | £30 to £60 per sq m labour, plus tiles and trims | Tiler |
| 6. Fit fixtures | 2 to 4 days | Covered by the plumbing figure above | Plumber |
| 7. Decorate and seal | 1 to 3 days | £400 to £700 | Decorator |
| 8. Snag and sign off | 1 day | Usually nil | You, builder |
1. Set the Scope, Layout and Wish List
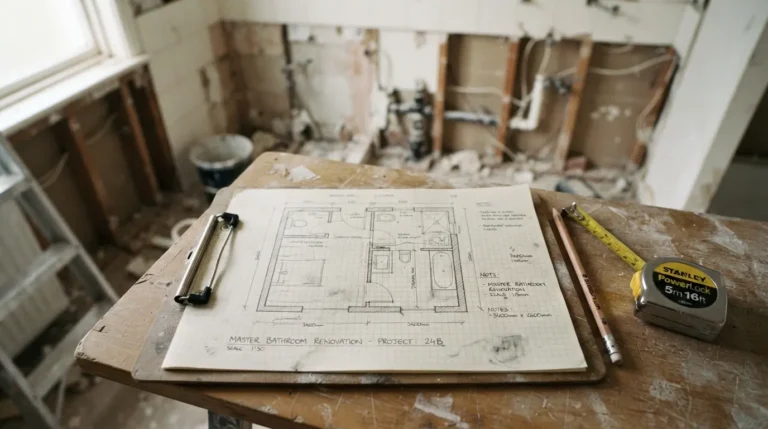
Decide whether you are refreshing or fully renovating, then fix the layout before choosing finishes. Check where the soil pipe runs, what the floor is made of and whether the joists can carry a bath. Sketch the plan and test it with your builder, because layout errors are the most expensive to reverse.
Real projects show why. One homeowner’s sketch placed the shower door where a sloped ceiling stopped it opening, and put the controls at the back, so the first blast of cold water would hit them. The contractor caught both on paper. If you want a soaking tub in an older house, ask whether the joists need reinforcing. Add accessibility features now, such as a step-free shower, and ask for timber backing behind walls so grab rails can be fixed later.
2. Order Products Before Work Starts
Order the vanity, bath, shower screen and tiles before demolition, and check every box on arrival. Plumbers position water lines from your chosen taps and vanity, and glass screens can take weeks. Ordering early stops trades waiting on a delivery.
One homeowner was quoted six weeks for a glass shower enclosure and waited about eight and a half, with no shower at home. View tiles in person and lay samples flat or upright as they will sit, because light changes how colour reads. Order roughly 10 to 15% extra tile for cuts and breakages, and confirm that valves, wastes and fixings suit your chosen products.
3. Plan Your Washing Routine, Then Strip Out
Arrange somewhere to wash before you start, switch off the water and electricity, then strip the room back to the structure. Stripping out reveals hidden problems such as water-damaged ceilings and old pipework, so pause and inspect before closing anything up.
If it is your only bathroom, plan for a fortnight or more of alternatives, and ask your builder about a temporary shower if the schedule slips. If you move plumbing or wiring, inspections may be needed before walls are closed.
4. Complete the First Fix
First fix means installing pipework, waste runs, cables, extractor fan ducting and heating feeds before walls are closed. Position them from your final product choices, add timber backing where you may fix grab rails or wall-hung units, and have the work tested and inspected before boarding.
Book the plumber and electrician back to back where you can, because a gap of a few days between trades is normal. Keep any electrical or plumbing certificates safe, since buyers may ask for them later.
5. Board, Plaster and Waterproof
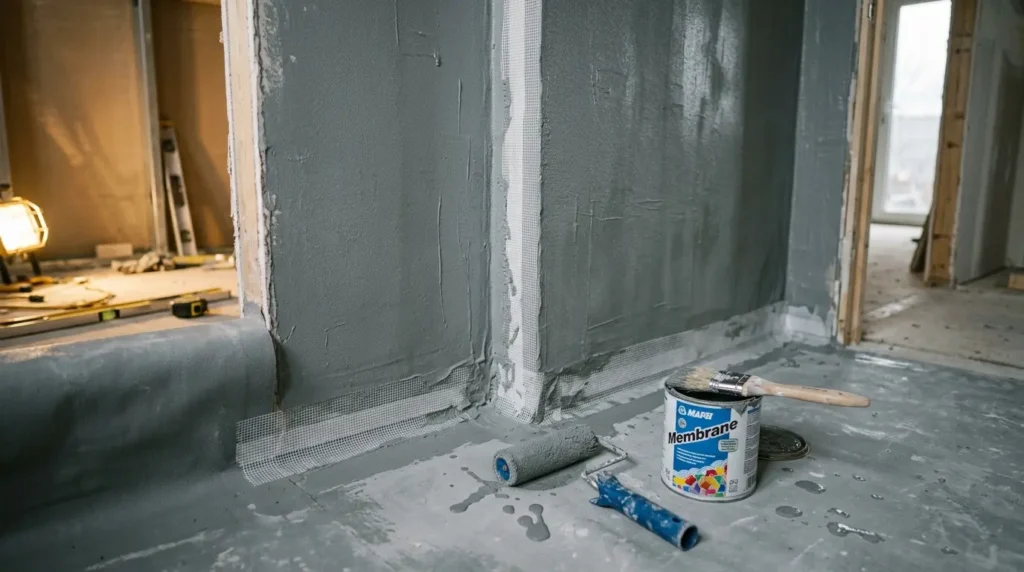
Once services are in, board and plaster walls and ceiling, level the floor, then waterproof shower areas and floors before any tile goes on. Give plaster and membranes the drying and curing time the maker specifies, because rushing it can compromise the waterproofing.
Older houses often need extra work here. One 1930s floor needed two layers of cement board in places to level it, and one sagging ceiling meant swapping a wall and re-skimming the whole ceiling, which added days. Waterproof shower and bath surrounds at the very least, and the whole room for a wet room.
6. Tile Walls and Floors
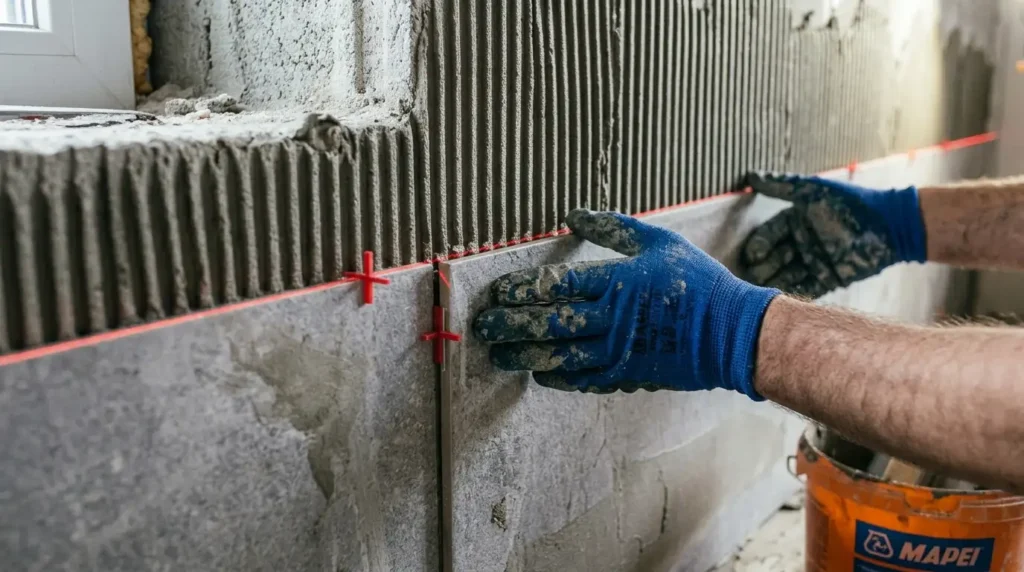
Tile after the waterproofing has cured, and plan the layout before the first tile goes up so the smallest cuts land in less visible places. Large-format tiles reduce grout lines and speed the job, while mosaics suit splashbacks. Remove old tiles rather than tiling over them if you can.
Tiling takes longer than most people expect, because adhesive and grout need time to set and good tilers never rush the setting-out. Choose trims and grout colour with the tile, and expect small or patterned tiles to add labour cost. Large tiles may need two people to cut and place.
7. Fit Fixtures and Fittings
Once tiling is done, fit the toilet, basin, vanity, taps, shower controls, screen and towel rail, followed by second-fix electrics such as lights and the extractor fan. Test every connection for leaks before sealing.
Vinyl or laminate flooring can wait until the fixtures are in place, which avoids scuffs. Check that the vanity and tapware line up with the water lines you set at first fix, and keep spare tiles and fixings for future repairs.
8. Decorate, Seal and Snag
Paint last so you are not touching up scuffs, then apply sanitary silicone, test lighting and extraction, and walk the room with a snag list. Collect all certificates and store them safely.
Test paint samples on several walls in real light, because the same colour can read differently over primed and unprimed surfaces. Use paint suited to bathrooms, and keep a small kit of silicone, grout and sealant for quick fixes.
Should You Tile Before or After Fitting Fixtures?
Fit baths and shower trays before wall tiling, then tile down to them and seal the joint. Fit toilets, basins, vanities and taps after tiling. Sources differ slightly on the exact order, but this sequence gives cleaner tile edges and a better seal where the most water lands.
One trade guide puts tiling before all fixtures, while a builders’ schedule shows the bath and other second-fix plumbing going in before tiling. Both work for different items. Floor-standing and wall-hung pieces go last so tile cuts stay simple, while baths and trays need to be in place so tile can meet them.
How Long Does a Bathroom Renovation Take?
A like-for-like refit can take one to two weeks, while a full strip-out with tiling and waterproofing typically takes three to six weeks on site. Add planning, ordering and drying time. Delays usually come from back-ordered products and hidden damage, not the work itself.
Sources vary. One builders’ guide says a couple of weeks for simple installs and several for complex ones, another suggests roughly a week per major stage, and a specialist installer quotes one to two weeks for a standard job. The homeowner project mentioned earlier ran about six months. Build buffer days between trades, book good tradespeople early, and expect wet rooms to take longer.
What Hidden Problems Should You Expect?
Expect surprises in older homes: water-damaged ceilings, uneven floors, outdated pipework and joists that need reinforcing. Budget 10 to 15% contingency, more for older properties, and inspect the room as soon as it is stripped, before you order finishes that depend on fixing the problem.
- Sagging or damaged ceilings: these must be repaired or replaced before tiling, and can add several days.
- Uneven floors: older homes may need extra layers of board or a levelling compound before tiles go down.
- Old pipework and wiring: these are often replaced once walls are open, and cost more if found late.
- Late deliveries: back-ordered glass screens and vanities can leave you without a shower for weeks.
- Layout clashes: sloped ceilings, door swings and control positions all need checking on paper first.
What Can You DIY and What Needs a Professional?
DIY suits painting, accessories, assembling furniture and simple tiling. Plumbing, electrics, waterproofing and anything structural should go to qualified professionals, and electrical work in bathrooms must comply with local rules, such as Part P in England.
In the UK, replacing sanitaryware and taps does not need building regulations approval, but relocating a bathroom, altering drainage or doing electrical work near wet areas does. Rules vary by country, so check locally. Mistakes on technical work usually cost more to fix than the labour you saved.
Conclusion
The safest way to renovate a bathroom is to fix the layout first, order long-lead products early, and let each stage finish and dry before the next trade starts. Waterproof carefully, tile down to baths and trays, and paint last. Keep 10 to 15% in reserve for whatever the strip-out reveals. Start today by checking where your soil pipe runs and asking for delivery times on your shower screen.
FAQs
How much does it cost to renovate a bathroom?
Roughly £3,000 to £5,000 for a basic refresh, £5,000 to £15,000 for a typical full renovation, and £10,000 or more for high-end work in the UK. Prices are approximate and vary by country and region. Add 10 to 15% contingency for surprises, especially in older homes.
Can you tile over old bathroom tiles?
It is usually better to remove them. Tiling over adds thickness, can hide loose or damp tiles, and complicates trims and fittings. Some engineered wall panels can fit over sound, clean tiles, so ask your installer before choosing.
How much of the bathroom needs waterproofing?
Waterproof the shower area, bath surrounds and, in many designs, the whole floor. A wet room needs the entire room tanked. Membranes must cure fully before tiling. Rules and best practice vary by country, so follow the product maker’s instructions and local requirements.
When do you need a builder rather than a fitter?
Use a builder when you are moving walls, changing structure, creating a wet room, reinforcing floors, sourcing from several suppliers or needing building regulations sign-off. A fitter can handle like-for-like swaps. A builder can also coordinate plumbers, electricians and tilers.
What do you do without a bathroom during a renovation?
Arrange somewhere to wash before work begins, such as another bathroom, a friend’s home or a gym. Ask your builder about a temporary shower if a screen delivery slips. Plan for at least a couple of weeks, and longer if products are on back order.
How do you keep a renovated bathroom free of mould?
Fit an extractor fan sized for the room and run it during and after showers. Keep silicone and grout in good condition, wipe wet surfaces and inspect tiles and fixtures for cracks. Use moisture-resistant paint or plasterboard where walls are not tiled or panelled.
Should you add accessibility features now?
Yes, if needs may change. Step-free showers, lever taps, slip-resistant floors, better lighting and reinforced walls for future grab rails cost far less during a renovation than later. Wider doorways help too. These features suit every user and still look modern.
Which product decisions should you make first?
Choose the vanity, taps, shower valve and bath first, because plumbers position water lines from them. Tiles, paint and accessories can follow. Confirm dimensions from spec sheets and check them against your actual room, not just on paper.