How to Expose and Restore a Brick Wall Indoors

Exposing and restoring a brick wall indoors means testing the brickwork’s condition and checking for asbestos before you remove any significant plaster, then stripping it back carefully, cleaning, and sealing the surface underneath. Most DIY guides jump straight to the satisfying part, hacking away at plaster, without covering the safety checks that genuinely matter first, and skipping them is the difference between a straightforward weekend project and a genuine health risk.
Decide Whether Exposed Brick Actually Suits the Room
Before committing to the work, weigh the honest trade-offs. Exposed brick is genuinely strong and durable, making it easier to mount shelves and heavier fixtures than on a standard plastered wall, and it suits loft-style, industrial, or cottage interiors particularly well. On the other side, brick’s porous surface is harder to keep clean than a smooth plastered wall, since dust and grime settle into it more readily, it limits your future decorating flexibility once the brick itself becomes the room’s main feature, and removing plaster takes away a layer of insulation, which can genuinely make a room slightly more expensive to heat, worth factoring in if the wall is on an external side of the house.
Test Before You Remove Any Significant Plaster
This is the step every purely aesthetic exposed brick guide skips, and it’s the one that matters most. Start by removing a small test section of plaster to check the brickwork’s actual condition underneath, if it’s warped, crumbling, or shows clear water damage, get a specialist to assess the wall and its foundations before doing anything further. If your property was built or last replastered before the 1990s, test for asbestos before removing any significant amount of plaster, older plaster, textured coatings, and some adhesives can contain it, and disturbing it releases fibres that are genuinely dangerous to breathe in. Get a sample tested by an accredited asbestos testing company rather than guessing, this isn’t something you can determine by looking at the wall. It’s also worth being honest about existing damp: if the wall has a history of damp, exposing it won’t fix the underlying cause, and sealing a wall that’s still damp traps moisture inside rather than solving anything.
Gather the Right Tools and Protect the Room
You’ll need a sturdy hammer, a putty knife or scraper, a masonry chisel, an industrial respirator, genuinely, not a paper dust mask, safety gloves and goggles, a wire brush, rags or sponges, a tarp or plastic sheeting, a vacuum, and a suitable brick sealer for later. Lay sheeting flush against the base of the wall and cover any adjacent walls too, plaster removal creates considerably more dust and debris than people expect, and this preparation step saves real time on cleanup afterward.
Strip the Plaster Back Carefully

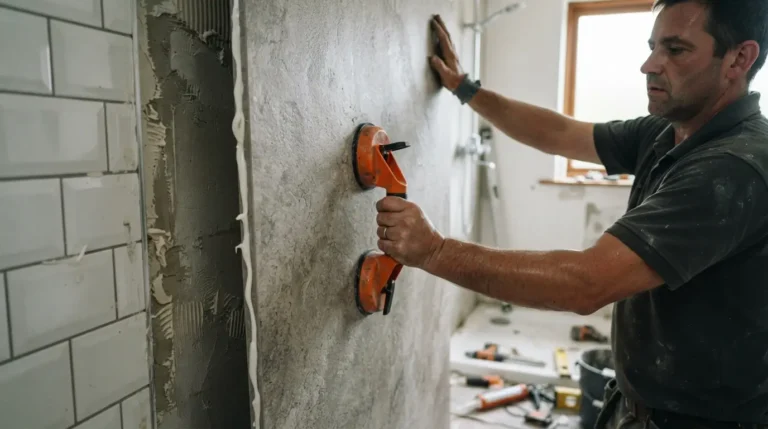
Put on your respirator, gloves, and goggles before starting anything. Hold your masonry chisel at roughly a 45-degree angle against the wall and tap the hammer against the back of it to break the plaster away from the brick underneath, working steadily rather than forcing it, and adjusting your angle as you find the pressure that works. Once most of the plaster is off, a putty knife held flush to the wall at closer to 90 degrees helps lift stubborn remaining patches without gouging the brick, short, flicking motions tend to work better here than heavy scraping. Go genuinely slowly around the mortar joints specifically, older lime mortar is often softer than the surrounding brick, and it’s easy to accidentally damage it with a chisel in a way that causes more harm than the plaster removal itself.
Brush, Clean, and Assess the Brick Underneath
Once the bulk of the plaster is off, a wire brush removes leftover residue, loose mortar, and surface erosion, and this step also reveals any cracks or gaps in the brickwork that might need repointing before you move on. Wipe the wall down with a mild detergent solution and a sponge, for more stubborn staining, let the detergent sit for 5-10 minutes before wiping it away, then leave the wall to dry fully overnight before doing anything further to it.
Seal the Wall Properly Once It’s Clean and Dry
Once the brick is completely clean and dry, apply two coats of a suitable brick sealer, following the manufacturer’s specific guidance on drying time between coats. This step matters more than it might seem, exposed brick is genuinely porous, and sealing protects it from ongoing dust build-up while making future cleaning considerably easier than trying to maintain unsealed brick day to day.
Consider a Limewash or Paint Finish Instead of Leaving It Raw
Raw exposed brick isn’t the only finish worth considering once the wall is stripped back. A limewash softens the brick’s natural red tones and lightens the overall look while still letting the wall breathe, and it genuinely deepens in character with each additional coat rather than looking flat and uniform. Painting the brick in a bold block colour, or even a mural, is another route entirely, giving you the texture of brick with a completely different visual effect to the traditional exposed look, worth considering if raw brick doesn’t quite suit your room’s existing palette.
What to Do If the Brick Underneath Isn’t Worth Exposing
If your test patch reveals brickwork that’s genuinely too damaged, uneven, or unattractive to expose properly, brick slips give you the same visual effect without depending on the original wall being structurally or aesthetically sound. This is also the more sensible route if your test patch or asbestos check raises concerns you’d rather not deal with, since brick slips are applied over the existing wall rather than requiring you to strip back to bare masonry at all.
Final Thoughts
Exposing and restoring a brick wall indoors is a genuinely rewarding project when the safety groundwork gets done properly first, testing the brick’s condition, checking for asbestos in an older property, and being honest about any existing damp before you remove a single significant section of plaster. Get those checks right, strip the plaster carefully, and seal the finished wall properly, and you’ll have a genuine feature that lasts, not a project that turns into a much bigger problem than the one you started with.
FAQs
Do I need to test for asbestos before exposing a brick wall?
Yes, if your property was built or last replastered before the 1990s. Older plaster, coatings, and adhesives can contain asbestos, and you can’t determine this by looking, get a sample tested by an accredited asbestos testing company before removing any significant plaster.
Can I expose brick on an external wall?
Technically yes, but external walls carry a genuinely higher risk of ongoing damp once the plaster and its protective render or coating are removed, so this needs more careful assessment than an internal wall. Get a specialist opinion before removing plaster from external-facing brickwork.
Does exposed brick reduce a room’s insulation?
Yes, to some degree. Removing plaster takes away a layer of insulation, which can make a room slightly more expensive to heat, this effect is more noticeable on external walls than on interior partition walls.
What if my brick is damaged once it’s exposed?
Small areas of crumbling or damage can sometimes be repaired with masonry filler or repointing, but more significant structural issues need a professional assessment. If a large portion of the wall isn’t suitable to remain exposed, brick slips are a practical alternative that still gives the look.
Should I hire a professional to expose a brick wall?
It depends on the scope of the job and your confidence handling plaster removal, asbestos testing, and any structural surprises underneath. For a larger wall, an older property, or genuine uncertainty about what’s involved, many homeowners choose a professional builder for a cleaner result with less risk.