How to Add Wall Panelling to a Bedroom

Adding wall panelling to a bedroom comes down to planning it properly on paper before a single strip of timber touches the wall, marking every socket, switch, and piece of furniture in advance, then transferring that plan precisely rather than working it out as you go. Most panelling that ends up looking slightly off, an uneven repeat, a socket landing mid-panel, wasn’t a cutting mistake, it was a planning step skipped in favour of getting straight to the satisfying part.
Measure and Draw Your Room Before You Touch a Panel
Measure every wall length, along with any recesses, bulges, windows, and doors, and note the exact position of anything fixed that can’t move, sockets, light switches, built-in furniture. Draw the room to scale on paper, it doesn’t need special software, a ruler and a pencil are genuinely enough. This is the least exciting part of the whole project and also the part that saves you the most time later, since working out a design on paper takes minutes to adjust, while correcting a mistake already nailed to the wall takes considerably longer.
Sketch Several Layout Options and Plan Around Furniture
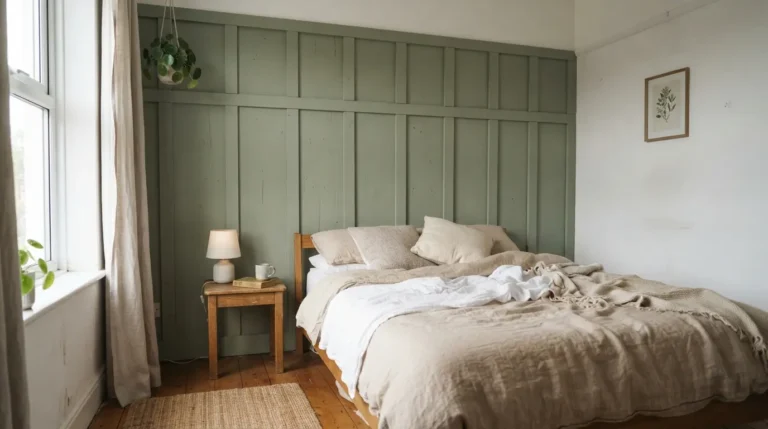
Lay a sheet of thin paper over your scale drawing and sketch out different ways the panelling could divide the wall, don’t settle on the first idea, try several. Look for a common width to base your sections on, the width of your door or your narrowest wall often gives you a natural starting measurement, and keep your design to no more than two or three different panel widths across the room so it still reads as one coordinated scheme rather than a patchwork. In a bedroom specifically, plan the panelling around where your bed and any art will actually sit, a panel section landing awkwardly behind a headboard, or too narrow to frame a piece of art you want to hang within it, is much easier to fix on paper than to notice once the timber’s already up.
Check Every Socket and Switch Position Twice
This is the detail that causes more regret than any other single mistake in a panelling project. Mark every socket and switch on your drawing before finalising the panel layout, and don’t assume they’re all at the same height, bedrooms in particular often have sockets at varying heights for lamps, chargers, and headboard-side outlets. A panel section that lands squarely over a socket, rather than around it, means either an awkward cut-out or redoing that section entirely, both easily avoided by checking this properly at the planning stage rather than once you’re already installing.
Transfer Your Design to the Wall With Tape, Not Guesswork
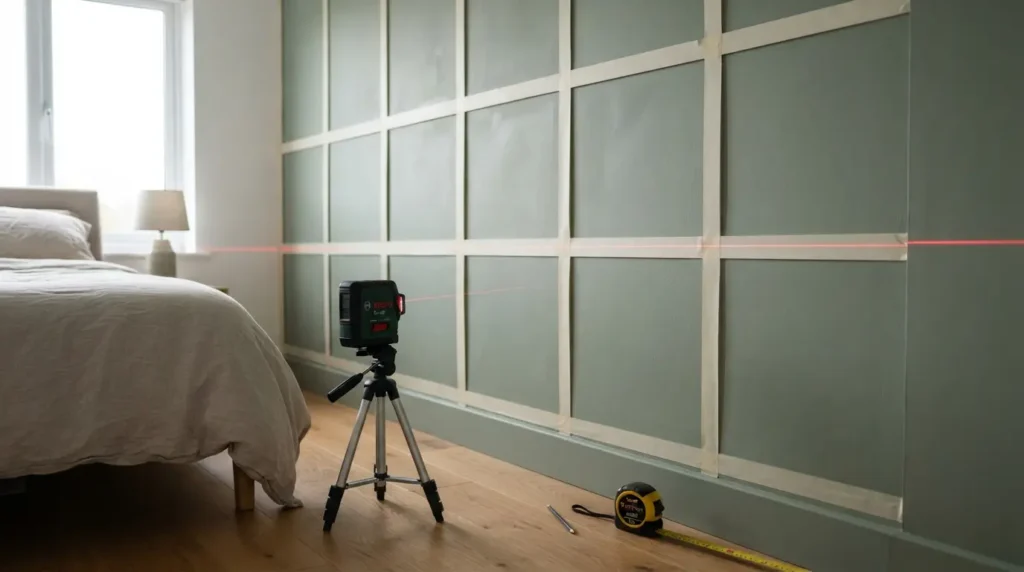
Once you’re happy with the design, transfer your measurements to the actual walls, marking where every vertical and horizontal line will fall. A laser level makes this considerably faster and more accurate than a standard spirit level, since it projects a continuous line all the way around the room, which is genuinely useful for making sure panels on opposite walls line up with each other. Mark your lines with masking tape rather than relying on pencil dots alone, and decide upfront whether you’re taping just inside or just outside your measured lines, so you know exactly which edge to align the panelling to once you start fixing it in place.
Cut, Join, and Fix the Panels Properly
Double-check every measurement before cutting, and if you need to join two pieces of timber to make a longer length, cut both ends at a 45-degree angle so they slot together rather than butting them square, this gives a considerably more secure, less visible join once painted. A mitre saw makes these cuts faster and more consistent than a hand saw and mitre box, and it’s worth the investment or a short-term hire if you’re panelling more than a single small wall. Sand any rough cut edges lightly before fixing anything, cleaner edges sit against the wall more neatly and take paint better. For fixing the panels themselves, a nail gun is faster and more reliable across a full room, while a strong construction adhesive works well specifically in any spot where you’re not entirely sure what’s behind the wall, cables and pipes are a genuine risk when nailing blind, so use adhesive rather than a nail gun wherever you have any doubt.
Caulk Every Edge Before You Paint
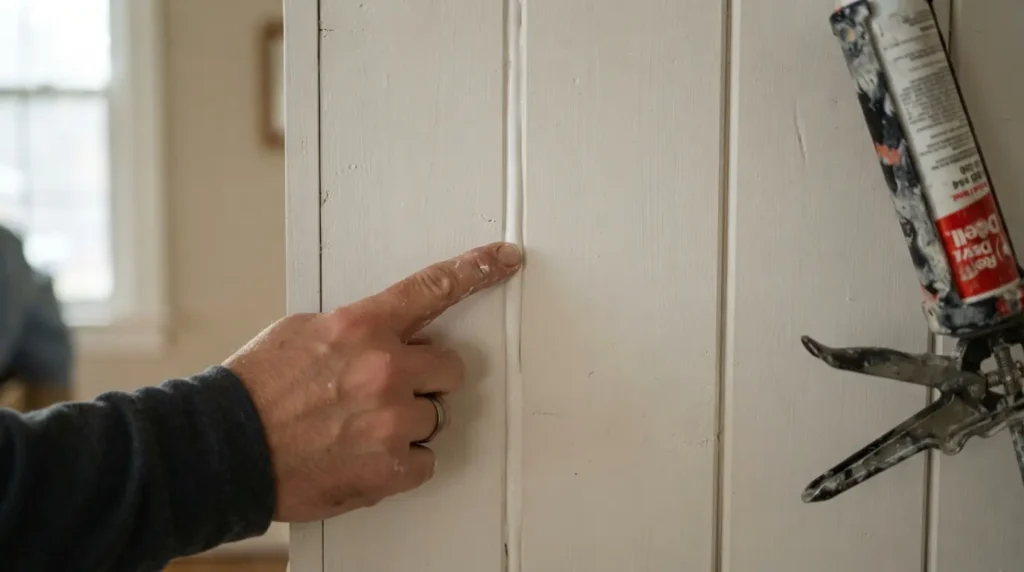
Don’t skip this step, however tempting it is to call the project finished once the panels are up. Run a thin, even line of decorator’s caulk along every edge and join, then smooth it with a damp finger while it’s still wet, caulk that’s left to dry before smoothing is far harder to work with and nearly impossible to sand neatly afterward. This single step does more to hide small imperfections and make the panelling look genuinely professional than almost any other part of the process, and it’s worth taking your time over rather than rushing to get to the paint. Leave it a full day to dry before painting.
Choose the Right Paint Finish and Budget Realistically
A standard matt or flat emulsion works perfectly well in a bedroom, since it sees considerably less daily contact and wear than a hallway or a dado rail in a high-traffic area, where a more durable satin or eggshell finish holds up better long-term. Costs vary significantly depending on room size, timber choice, and how much of the wall you’re panelling, sourcing timber from a proper timber merchant rather than a general DIY store is generally worth the small extra cost, since the wood tends to be straighter and easier to work with, which matters more than it sounds once you’re trying to get consistent, tight joins across a whole room.
Common Mistakes to Avoid
The most frequent mistake is skipping the paper planning stage and working it out directly on the wall, which is exactly how sockets end up mid-panel and opposite walls fail to line up. The second is rushing or skipping the caulk step, a panelling job that looks slightly amateurish almost always traces back to uncaulked or poorly smoothed joints rather than the cutting itself. The third is nailing blind into a wall without checking for cables or pipes first, a genuinely common and entirely avoidable mistake that a moment’s caution, or a switch to adhesive in uncertain spots, prevents completely.
Final Thoughts
Adding wall panelling to a bedroom really comes down to the planning you do before you ever pick up a saw, measuring properly, checking every socket, and sketching more than one layout before committing. Get that groundwork right, take your time with the caulking, and the finished wall will look like a considered, professional addition to the room rather than a project that was worked out as it went along.
FAQs
Is panelling a bedroom wall a good DIY project for beginners?
Yes, genuinely. The planning stage takes the most time and care, but the actual cutting and fixing is straightforward once you have a clear plan to follow, making it a reasonable first panelling project for a confident beginner.
Should I nail or glue panelling to the wall?
A nail gun is faster and more reliable across a full room, but use a strong construction adhesive in any spot where you’re unsure what’s behind the wall, since nailing blind into a cable or pipe is a real, avoidable risk.
How do I stop panelling looking crooked in an old house?
Older properties are rarely perfectly straight, even level, properly measured panelling can look slightly uneven against a genuinely wonky wall or ceiling line. Using a laser level to keep your own lines consistent, rather than trusting the wall itself, is the best way to minimise this.
What paint finish should I use on bedroom panelling?
A standard matt or flat emulsion works well in a typical bedroom, given the relatively low daily contact compared with a hallway or stairwell, where a tougher satin or eggshell finish is worth the extra durability.
How much does it cost to panel a bedroom wall?
Costs vary by room size, timber choice, and how much of the wall you cover, a single feature wall costs considerably less than panelling an entire room floor to ceiling. Treat any figure as a rough guide for your specific project and location.