15 Kitchen Island Ideas for Every Kitchen Size

A kitchen island can add prep space, storage and a social hub to almost any layout, provided the size and shape match the room. The best kitchen island ideas balance clearance, function and material choice rather than chasing a single “perfect” look. If you have ever stood in a showroom wondering whether an island will swallow your galley kitchen or sit lost in a large one, you are not alone. Getting the proportions and purpose right from the start is what separates an island that earns its keep from one that just gets in the way.
1. Let the Island Define Your Kitchen’s Traffic Flow
Before choosing a finish or shape, decide what job the island needs to do for your layout. In open-plan kitchens, an island can mark out a working zone on one side and a social or seating zone on the other, so guests naturally gather away from the stove.
Think about where the sink, hob and fridge sit before you commit to a position. A good rule of thumb is to keep at least 90 to 100cm of clear walking space on every side. Skip this step and even a beautifully finished island can end up blocking the exact route you walk fifty times a day.
2. Go Slim and Slot In a Galley-Style Island for Small Kitchens
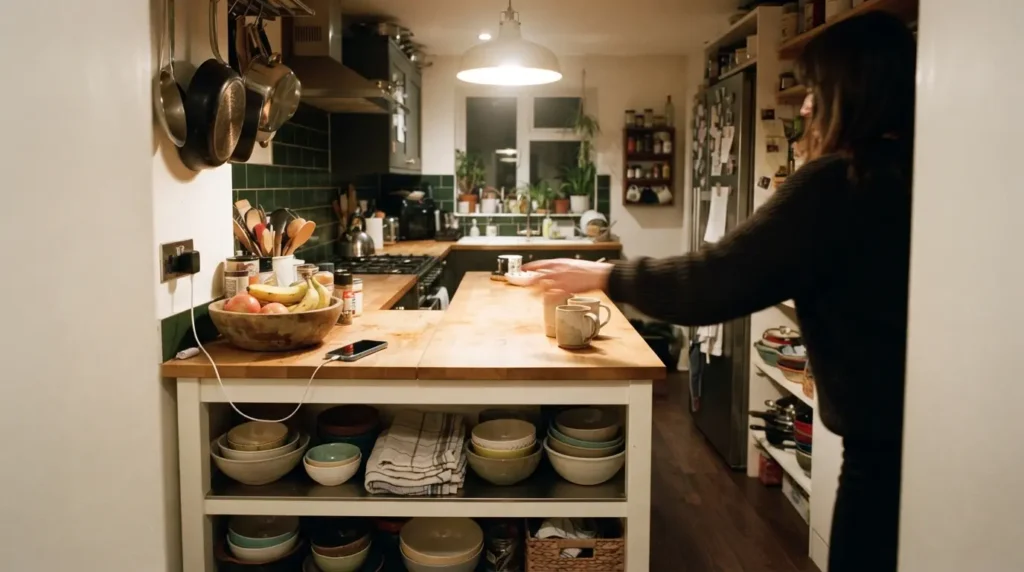
A narrow island, often 60 to 90cm wide, can work in tighter kitchens as long as it is treated as a single-purpose piece rather than asked to do everything. Use it as a prep surface or a landing spot for hot pans rather than trying to squeeze in a sink, hob and seating.
Most homeowners find that once you drop below about 90cm of clearance on the walkway side, the kitchen starts to feel cramped even if the island itself looks neat on a floor plan. If you are that tight on space, a slim island with open shelving at one end keeps things useful without adding visual bulk.
3. Choose an L-Shaped Island to Add a Natural Divide
Breaking away from a standard rectangle can solve layout problems that a straight island cannot. An L-shaped island naturally separates the cooking side from a seating or serving side, which helps in kitchens that double as a dining or hangout space.
This shape suits medium to large kitchens best, since the extra footprint needs room to breathe. It also creates a built-in corner for a hob or sink without eating into your main prep run, though the corner cabinetry inside an L-shape is trickier to fit out efficiently and may need bespoke joinery.
4. Consider a U-Shaped Island for Maximum Workspace
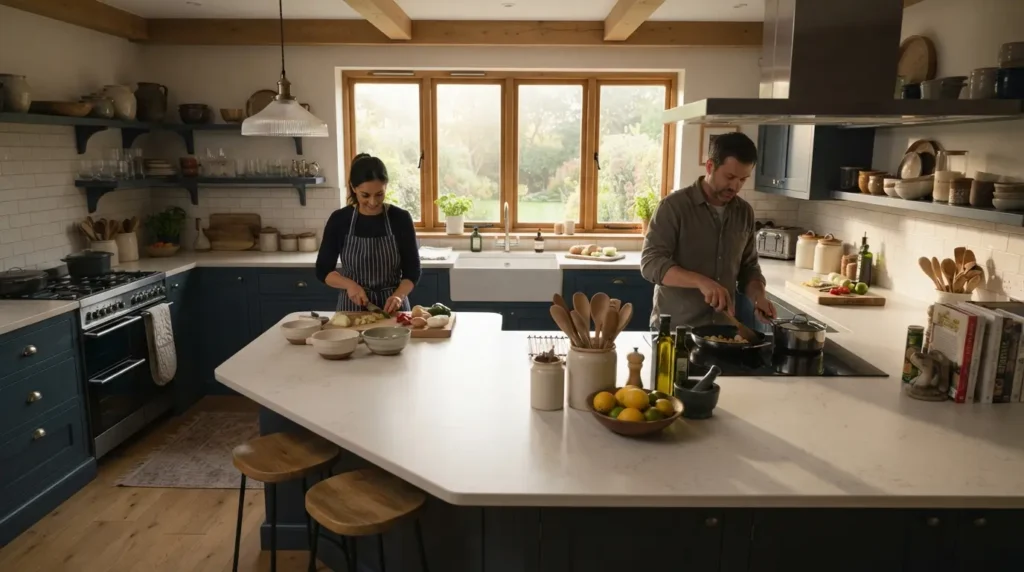
For serious cooks or larger households, a U-shaped island wraps worktop around three sides, effectively creating its own mini kitchen within the kitchen. It suits open, spacious rooms where more than one person cooks at once.
The trade-off is floor space. A U-shaped island needs generous clearance on all sides, typically upwards of 105 to 120cm, or the enclosed feel it is meant to create ends up feeling like a bottleneck instead. This is not a shape to attempt in a kitchen under about 20 square metres.
5. Try a Mobile or Rolling Island When Floor Space Is Tight
A freestanding island on locking castors gives you extra prep space and storage without committing to a fixed footprint. Roll it out when you are cooking for a crowd and push it against a wall the rest of the time.
Mobile islands work particularly well in rented homes, small apartments or kitchens still being planned in stages, since there is no plumbing or structural work involved. The compromise is stability. A lighter, wheeled unit will never feel as solid as a fixed island, and heavy chopping can cause it to shift slightly if the castors are not locked.
6. Add a Peninsula Instead of a Freestanding Island
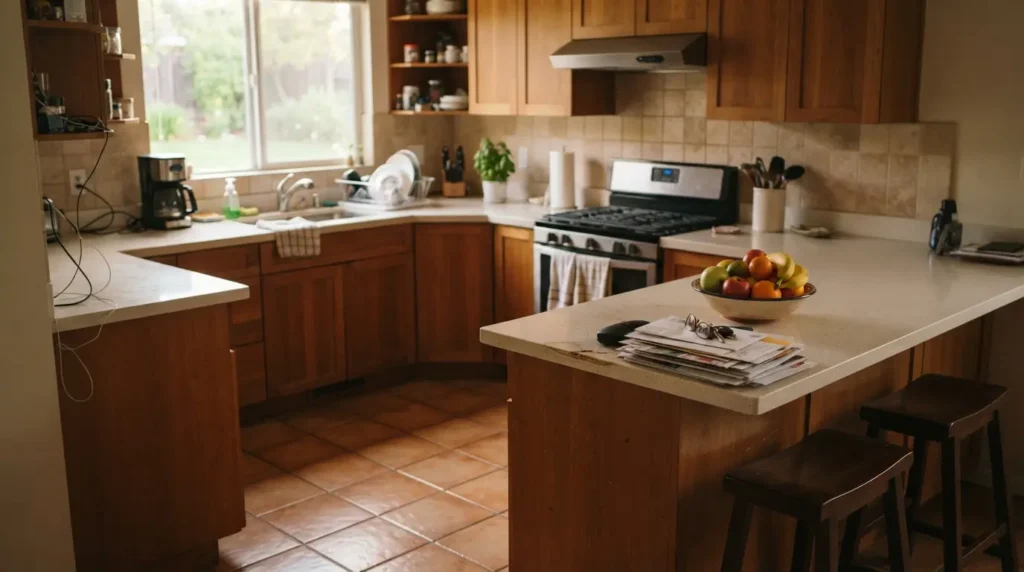
If you cannot spare the clearance a freestanding island demands, a peninsula, an island attached to a wall or run of cabinetry on one side, can deliver similar prep space and an overhang for stools without needing walkway room on all four sides.
Peninsulas are a practical middle ground for small and medium kitchens, and they still create a visual break between kitchen and living space in an open-plan layout. You lose the ability to walk all the way around it, but for many households that is a fair swap for the extra floor space it saves.
7. Build In a Prep Sink for Multiple Cooks
A second, smaller sink on the island lets one person wash vegetables or fill a pot while someone else uses the main sink, which keeps two-cook households from colliding at the same tap. Position it towards one end of the island so guests can grab water without walking through the main cooking zone.
This is a genuine luxury add rather than a necessity. Plumbing a second sink into an island means running new water and waste lines under the floor, which adds cost and reduces the drawer space available beneath the counter, so it is worth reserving for households that actually cook in pairs regularly.
8. Fit a Cooktop Into the Island for Sociable Cooking
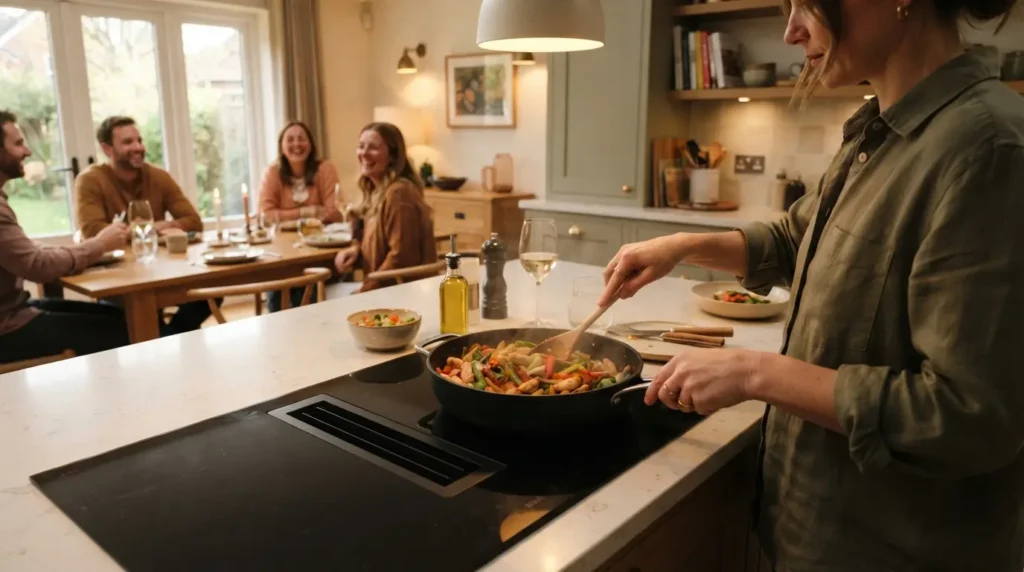
Putting the hob on the island keeps the cook facing the room rather than a wall, which works well for anyone who likes to chat with guests while cooking. It does require careful planning around extraction, since downdraft systems (which pull fumes down rather than up through a canopy hood) are the usual solution for an island hob but need strong, well-maintained filtration to actually clear steam and odours.
Budget for regular filter cleaning and be realistic about ventilation before committing. Utilities also need early coordination: routing gas, power and possibly water to the island affects the floor build-up, so it has to be resolved at the planning stage, not added on afterwards.
9. Mix Materials to Add Depth and Manage Budget
Using one material across the entire island can look flat, especially on a larger footprint. Splitting the countertop, stone on the prep side and timber on the seating side, for example, adds visual interest and lets you spend more on a premium material only where it will be seen and touched most.
This is also a genuine budget lever. A more affordable laminate or porcelain worktop on the working side, paired with a smaller run of quartz or marble on the seating side, gets you a high-end look without pricing the whole surface at premium rates.
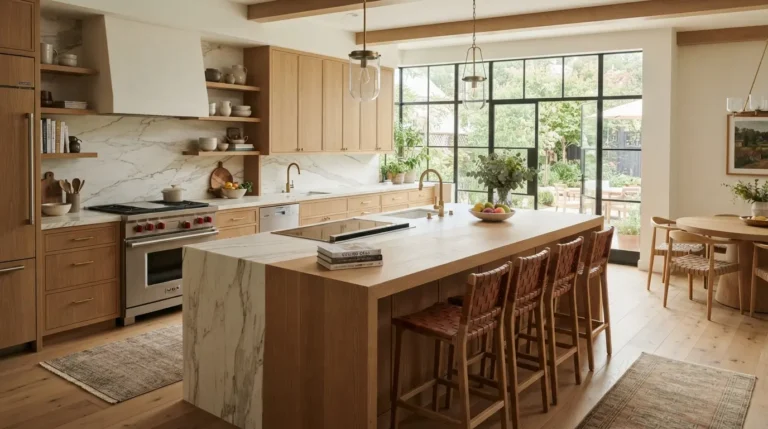
10. Go Bold with a Waterfall Countertop
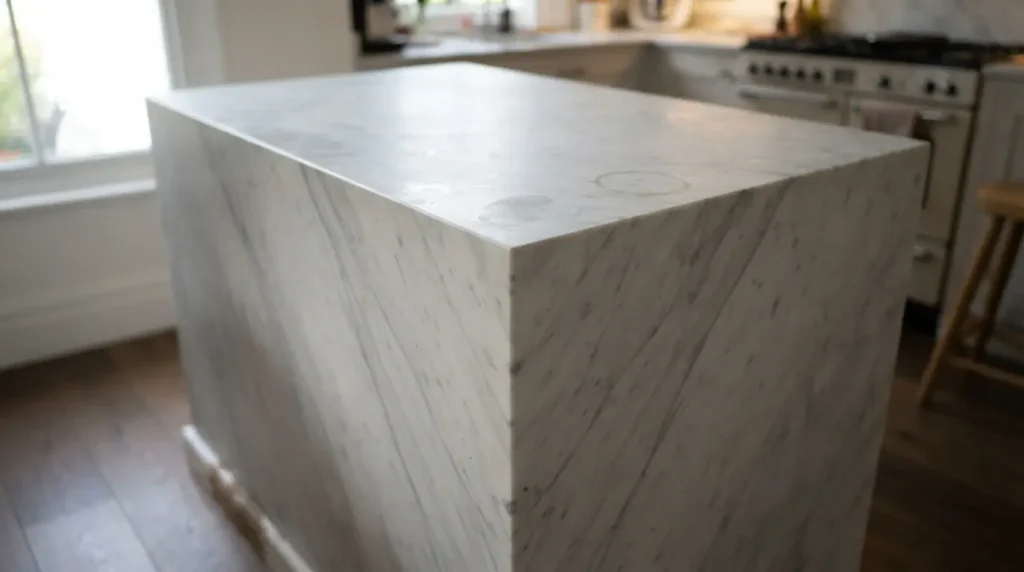
A waterfall edge, where the countertop material wraps down the sides of the island rather than stopping at a standard edge profile, turns a strong stone or engineered surface into the room’s obvious focal point. It reads as more expensive and more considered than a standard square edge, even on a modestly sized island.
Realistically, a waterfall edge adds to both material and fabrication cost, since it typically needs a mitred, seamed join that a skilled fabricator has to get right. Expect it to add a meaningful amount to your worktop quote versus a standard edge, with the exact figure varying a great deal by material, country and fabricator.
11. Design a Proper Breakfast Bar
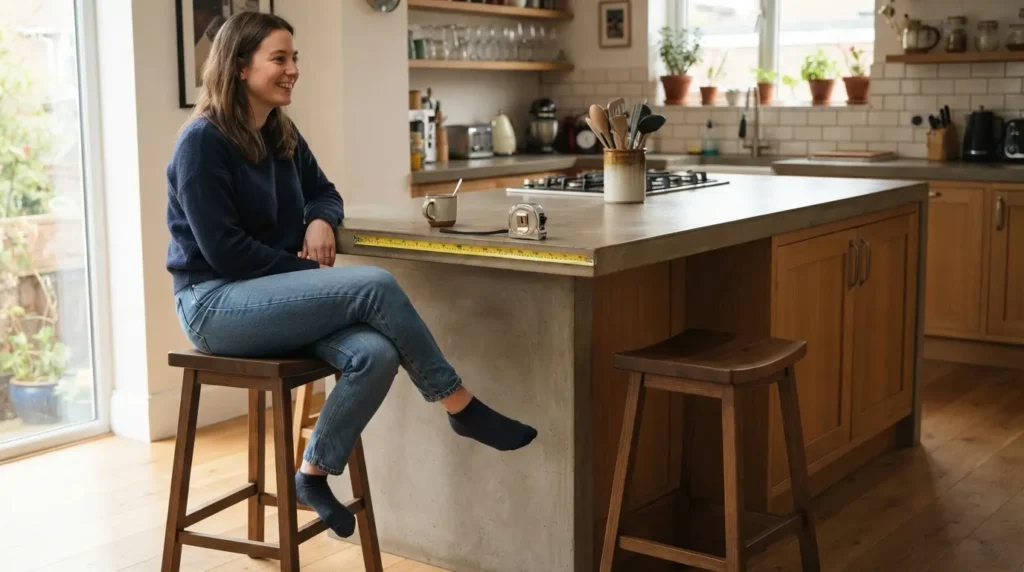
An island only works as a comfortable place to sit if the numbers are right. Allow roughly 60cm of width per person so stools do not feel elbow to elbow, and aim for at least 30cm of countertop overhang for knee room, ideally 38 to 46cm if people will sit for a full meal rather than a quick coffee.
Match stool height to the counter: 61 to 66cm seat height for a standard 91cm counter, or taller stools for a raised 107cm bar-height section. Once your overhang passes about 30 to 38cm, most fabricators will want corner brackets or legs underneath to support the counter’s weight safely.
12. Maximise Storage With Deep Drawers and Open Shelving
Deep drawers beat traditional cupboards for island storage because you can see everything at a glance instead of digging to the back for a stockpot. Reserve the working side for everyday prep tools and the outer side for bulkier, less frequently used items.
Open shelving at one end lightens the visual weight of a large island and gives you a spot to display cookbooks or everyday crockery, though it does mean regular dusting and a bit more discipline about what stays on view, since open shelves show clutter far more readily than a closed cupboard does.
13. Add a Banquette or Dining Extension for a Social Hub
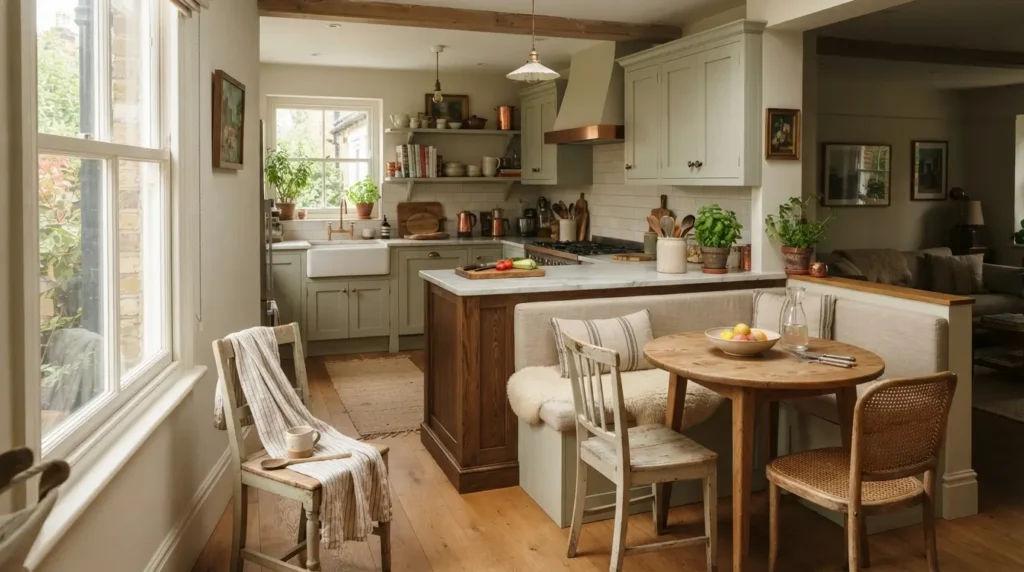
Extending the island with a built-in bench seat and small table turns it from a workstation into a proper gathering spot, which suits households that use the kitchen as their main living space. It softens the room, bridging the gap between a purely functional kitchen and a more furniture-led dining area.
Before committing, check the room can absorb the extra length, since a banquette effectively makes the island longer and the surrounding clearance tighter. Chairs bumping into cabinetry every time someone sits down is a common and avoidable mistake.
14. Play With Shape: Curved, Sculptural and Multi-Level Islands
A curved or chamfered island softens circulation routes and can feel more like a piece of furniture than a block of cabinetry, which suits larger, more architectural kitchens. Multi-level designs, a lower prep surface paired with a raised bar section, also let you screen the working mess from a seating area while adding visual interest through the change in height.
Bolder shapes look striking in photographs but need careful proportioning to age well. Pairing an unusual silhouette with classic, restrained materials tends to keep the design feeling considered rather than dated within a few years.
15. Get the Look on a Budget With Reclaimed or Simplified Bases
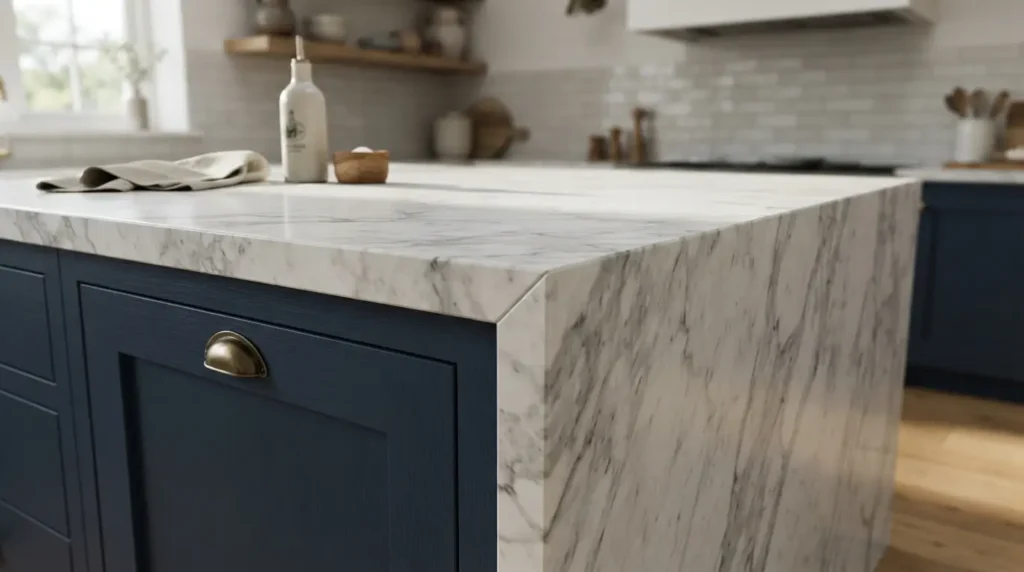
A kitchen island does not need to be fully bespoke to look design-led. Simplifying the cabinet carcass and spending on a thicker edge profile or a single waterfall end, rather than wrapping the whole island, delivers most of the visual impact for a fraction of the cost.
Reclaimed furniture, an old workbench, farmhouse table or shop counter, can also make a genuinely characterful island alternative in period homes. Just factor in that older timber may need levelling, sealing or minor repair work before it is fit for kitchen use, which a joiner can usually handle as part of the fit-out.
Choosing the Right Kitchen Island Size for Your Kitchen
Matching island size to room size is the single biggest factor in whether an island feels like an asset or an obstacle. These are general starting points rather than fixed rules, since layout, doorway positions and existing cabinetry all affect what will actually fit.
| Kitchen Size | Suggested Island Length | Suggested Width | Best Suited Idea |
| Small (under 12 sq m) | 90 to 150cm | 60 to 75cm | Slim galley island or mobile island |
| Medium (12 to 20 sq m) | 150 to 210cm | 75 to 90cm | Peninsula or standard rectangular island |
| Large (over 20 sq m) | 210 to 300cm+ | 90 to 120cm | L-shaped, U-shaped or multi-level island |
Whatever the size, keep a minimum of 90 to 100cm of clearance on every side that people will walk through, and closer to 105 to 120cm where two people regularly pass each other or where a seating side needs room for stools to be pulled out.
Conclusion
The best kitchen island ideas start with an honest look at your floor space and how you actually use the kitchen, not with a photograph you liked online. Match the shape and size to your clearance, decide whether the island needs to cook, store, seat or simply divide the room, and spend your budget on the details that will be touched and seen the most. Get those fundamentals right first, and the finish, whether that is a bold waterfall edge or a simple painted base, will do the rest of the work for you.
FAQs
How much does a kitchen island cost?
A simple island built from stock cabinetry with a laminate or basic stone-effect top typically starts around £800 to £1,500, though this varies a great deal by country and installer. A mid-range island with a quartz or granite top, an integrated sink or extra storage tends to sit between £1,500 and £4,000. A fully bespoke island with a natural stone waterfall edge, built-in appliances and custom joinery can run to £5,000 or considerably more. Treat all of these as broad, approximate ranges rather than fixed quotes, since labour costs alone can shift the total significantly from one region to another.
What is the smallest kitchen island idea that still works?
A compact island can work from around 90 to 120cm long, but keep the brief simple. Use it purely for prep space or light storage rather than trying to fit a sink, hob and seating into a footprint that small. If achieving that size means sacrificing your walkway clearance, a peninsula or a mobile cart is usually the better solution.
Is a kitchen island always worth adding?
Not always. If your kitchen cannot maintain at least 90cm of clear walking space around a fixed island, it can do more harm than good by restricting movement and making the room feel smaller rather than more functional. A peninsula, a slim mobile island, or simply more counter and storage along the walls can sometimes solve the same problems without the clearance penalty.
How do I keep a kitchen island easy to maintain?
Choose a countertop suited to how hard the island actually works. Quartz and porcelain resist stains and scratches with minimal upkeep, natural stone like marble looks beautiful but needs periodic sealing and is more prone to etching from acidic spills, and butcher block adds warmth but needs regular oiling to stay watertight. Wipe surfaces down after each use and avoid leaving standing water or oil near any seams or edges.
Can I add a kitchen island myself, or do I need a professional?
A simple freestanding or mobile island with no plumbing or electrics is a realistic DIY project for anyone comfortable with basic carpentry. The moment a sink, hob, or dedicated power circuit is involved, bring in a qualified plumber or electrician, since incorrect wiring or plumbing near a kitchen worktop is a genuine safety issue, not just a finish problem.