How to Install Tongue and Groove Panelling Step by Step

Installing tongue and groove panelling is one of the more satisfying DIY jobs once the measurements and the fixing method are clear. The boards interlock, the lines stay straight if you start square, and the finished wall looks deliberate. This guide walks through the practical sequence for a UK home, including the clearances, the battens, and the points where most people go wrong.
Prepare the Wall and Decide the Height
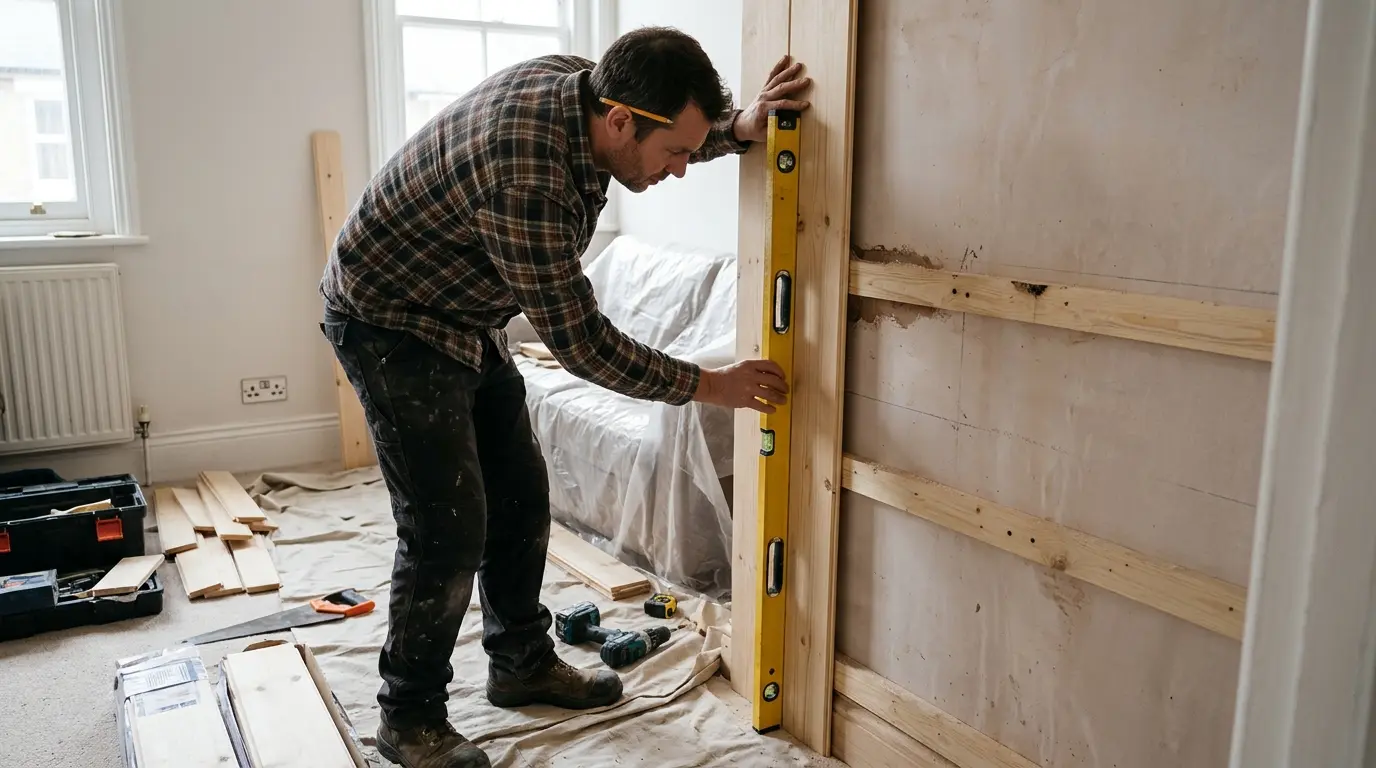
Start by deciding the finished height. For a traditional dado look, 900 mm to 1200 mm works in most rooms. Mark the height with a spirit level all the way around the wall. Check the wall for flatness with a long straight edge. If the wall is more than a few millimetres out, fix horizontal battens at roughly 400 mm centres so the boards have something solid to nail into. On masonry walls the battens also create a small void that helps with minor moisture movement.
Remove or protect existing skirting and architrave if the boards will sit behind them. If the skirting projects at least as far as the board thickness, you can fit the boards on top of the skirting and cover the joint with a small bead later. Measure the full width of the wall and divide by the visible face of the boards, usually around 95 mm, to know how many you need. Add ten per cent for waste.
Cut and Dry-Fit the First Board
Cut the first board to height, leaving a few millimetres at the top and bottom for expansion. Hold it in place and check it is plumb with a spirit level. The first board sets the line for every board that follows, so take the time to get it square. If the wall is not perfectly plumb, pack the back of the board lightly until it sits true. Once you are happy, mark the position of the studs or battens on the board so you know where the nails will go.
Prime any cut edges before you fix the board. MDF absorbs paint at the edges and will show a darker line later if left bare. A quick coat of primer now saves a difficult touch-up after the wall is finished.
Fix the Boards and Keep the Joints Tight
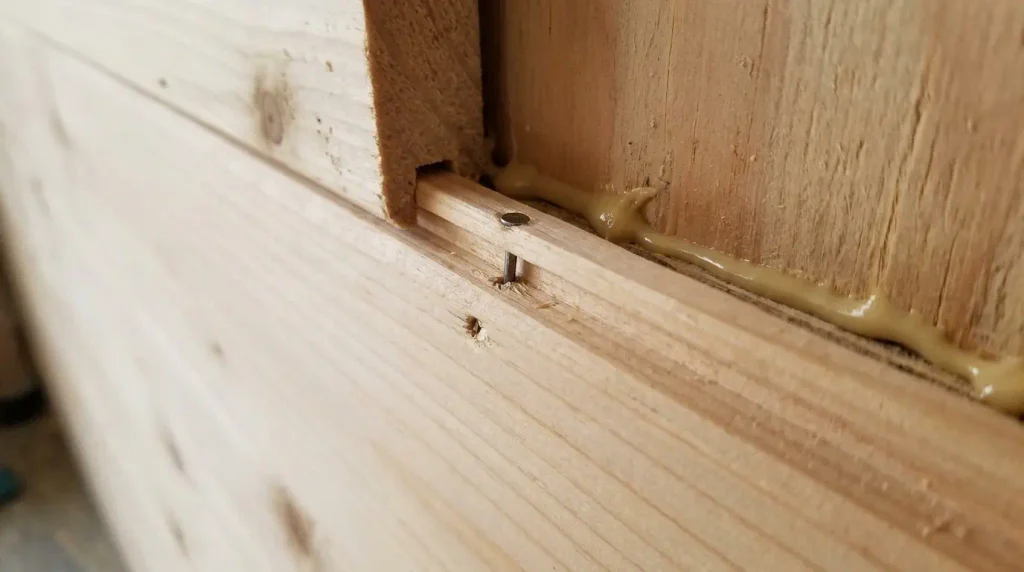
Apply a zigzag of grab adhesive to the back of the board, press it onto the wall, and nail through the tongue at an angle so the next board covers the fixing. Use ring-shank nails long enough to bite into the batten or stud by at least 19 mm. Continue across the wall, checking the top edge with a straight edge every few boards so the line does not drift. At the last board, rip it to width and fix it with adhesive and face nails that you will fill later.
Leave a small expansion gap at both ends of the run and cover it with the capping rail or the skirting. Solid timber boards move more than MDF, so the gap matters more with real wood. Do not glue the boards to each other; the tongue and groove joint should be able to move slightly.
Finish the Edges and Paint
Fit the capping rail at the top of the panelling, mitring the corners cleanly. If you removed the skirting, refit a profile that is deep enough to cover the bottom of the boards. Fill any face nail holes with a suitable filler, sand lightly, and apply the final paint system. Two coats of eggshell give a durable, wipeable surface that suits most living spaces.
Check sockets and light switches before you start. You will need to cut around them or extend the boxes so the faceplate sits flush with the new surface. Plan these cuts on the dry-fit so you do not discover a problem after the adhesive has set.
Common Mistakes and How to Avoid Them
If the room has a picture rail or existing dado, decide whether the new panelling will stop at that line or continue past it. Matching the height to an existing feature keeps the room coherent. Measure from the finished floor to the rail and set your panelling height to meet it cleanly. This small alignment makes the whole installation look as though it was designed with the rest of the joinery rather than added later.
After painting, allow the full drying time before you move furniture back against the wall. Eggshell can mark if it is not fully cured. A light clean with a damp cloth is enough for day-to-day care. Avoid harsh cleaners that can dull the finish over time. With the expansion gaps left and the fixings into solid points, the panelling should need little attention beyond the occasional wipe.
In rooms with underfloor heating, allow the boards to acclimatise in the room for a day or two before fitting. The temperature change can cause more movement than in a room with radiators only. Leave the expansion gaps a little larger if the supplier recommends it for heated floors. This small step reduces the chance of the boards bowing once the heating is used regularly.
Conclusion
Tongue and groove panelling goes up cleanly when the wall is prepared, the first board is square, and the expansion gaps are left. Measure the visible face width carefully, use adhesive plus nails into solid fixing points, and prime every cut edge. The finished wall will look like it was always meant to be there.
FAQs
How wide is the visible face of a typical tongue and groove panel?
Most MDF panels show about 95 mm once the tongue is hidden. Always check the product sheet before ordering.
Do I need battens?
On an uneven wall or on masonry, yes. Battens give a flat fixing surface and a place for the nails to hold.
Can I fit tongue and groove over existing wallpaper?
Only if the wallpaper is sound and the wall is flat. It is safer to remove loose paper and fill any holes first.