How to Layer Lighting in a Living Room for the Perfect Atmosphere

Here is how to layer lighting in a living room for the perfect atmosphere. Combine ambient light for a general glow, task light for reading and screens, and accent light for art and texture. Put each layer on its own dimmer, keep bulbs warm, and build the lighting scheme from low lamps upwards.
Most living rooms are lit by one bright ceiling fitting. At night it makes the room feel like a waiting area, throws glare across the TV and leaves the corners dark. The fix is rarely a better fitting. It is more sources at different heights, each controlled separately.
What Is Layered Lighting in a Living Room?
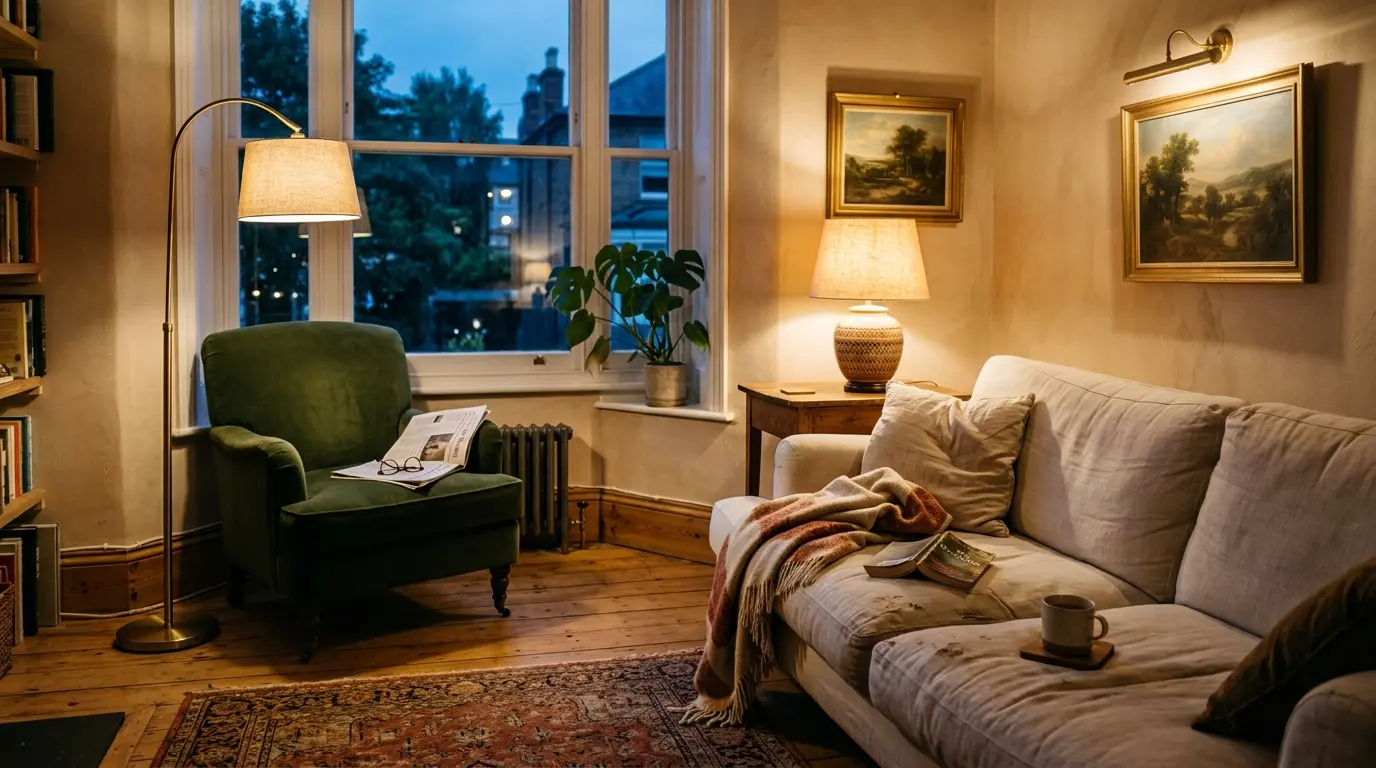
Layered lighting means using several light sources at different heights, each with a different job, so you can change the mood without changing the room. The core is ambient, task and accent lighting. Some designers add a fourth, decorative or mood layer, such as candles and lanterns.
| Layer | Job | Typical fixtures | Where it sits |
| Ambient | General glow, safe movement | Pendants, semi-flush lights, dimmable downlights, cove strips | Ceiling or perimeter |
| Task | Reading, hobbies, screens | Floor lamps, table lamps, swing-arm sconces | Beside seats |
| Accent | Draws the eye to features | Picture lights, spotlights, shelf strips, wall washers | Walls and shelves |
| Mood | Warmth and intimacy | Candles, lanterns, small lamps | Surfaces and corners |
Step 1: Map How You Use the Room
Before buying anything, list what happens in the room: reading, TV, hosting, working, dining. Each activity needs light in a different place. Sketch the seats, TV, windows, art and sockets, then mark where you want light after dark.
A simple test is to stand in the room at dusk with the main light off. Note where you reach for a lamp and where you feel in the dark. If the room also holds a dining table or opens onto a kitchen, plan that area as its own zone. Daylight matters too. A dim north-facing room needs a stronger evening scheme than a bright one.
Step 2: Build the Ambient Layer
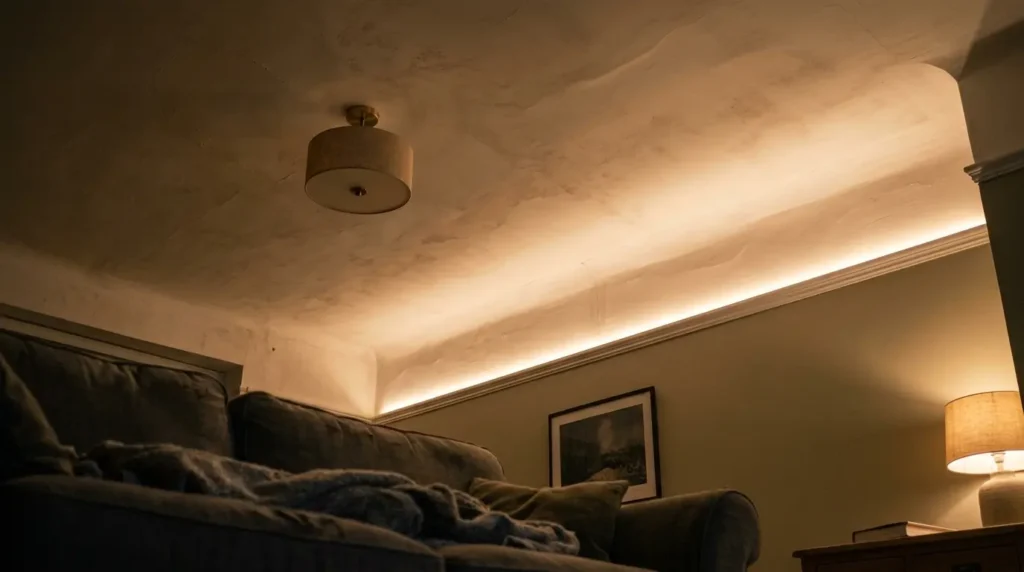
Start with ambient light, because it sets the base level everything else sits on. Use a ceiling pendant or semi-flush fitting, a few dimmable downlights, or LED strips hidden in a cornice that bounce light off the ceiling. Keep it dimmable so it can sit low in the evening.
Each option has a catch:
- Downlights: a grid looks neat in photos, but placed over seating they create harsh pools and glare. Use fewer, keep them away from where heads sit, and put them on a dimmer. In the UK and some other countries, downlights in ceilings that need fire protection should be fire-rated, so check your local rules.
- Pendants and semi-flush fittings: low ceilings suit flush fittings, while higher rooms can carry a statement pendant over the coffee table.
- Cove or cornice strips: these give the most even, indirect glow, but need a recess or pelmet and planning at the build stage.
A good rule of thumb is that ambient light should be the dimmest layer you use on a normal evening, not the brightest.
Step 3: Add Task Lighting at Every Seat
Give every seat that is used for reading or hobbies its own light source. Floor lamps beside armchairs, table lamps on side tables and swing-arm sconces by a sofa all work. Position the light so the bulb is hidden from your seated eye line and falls over your shoulder onto the page.
Height is where most people go wrong. A lamp that is too low throws shadows, and one that is too high causes glare. A useful starting point is a shade whose lower edge sits roughly at eye level when you are seated. Adjustable heads let you fine-tune it.
Lamps also do more than one job. A floor lamp beside a sofa can add ambient light, serve as a reading light and, with a dimmer, act as a mood lamp. They can be moved when you rearrange the furniture, which fixed fittings cannot.
Step 4: Place Accent Lighting
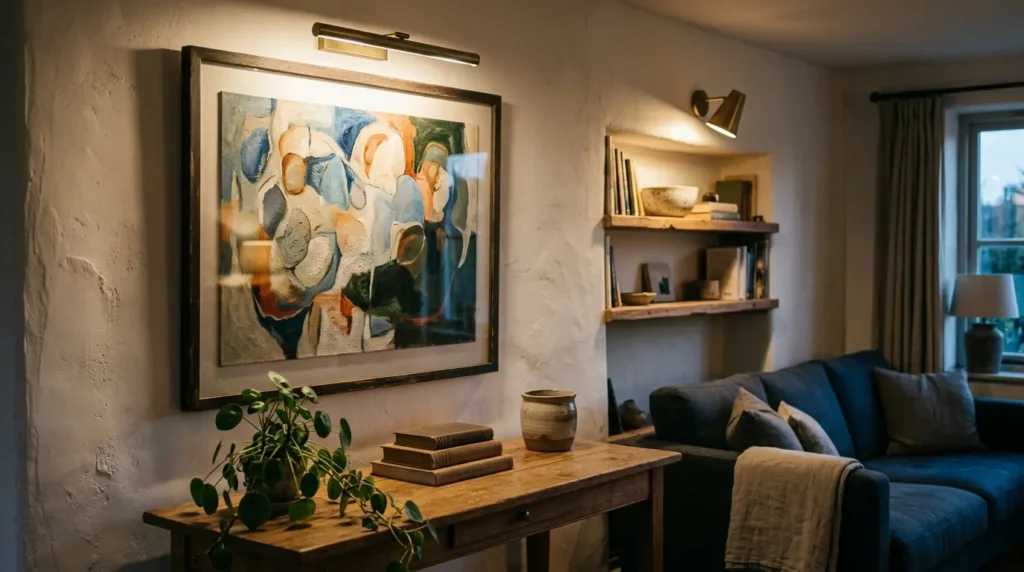
Choose two or three things worth highlighting, such as a large piece of art, a bookcase, a textured wall or a plant, and light them directly. The highlighted object should look noticeably brighter than the wall around it. A commonly quoted guide is that accent light should be about three times the strength of the ambient light around it.
Options include picture lights, tilting spotlights, wall washers, wall sconces flanking a mirror, and LED strips built into shelving. For spotlights, a tilt of around 30 degrees from the wall is a common starting point. It reduces glare and avoids a harsh hotspot.
The trade-off is restraint. Highlighting everything highlights nothing, and the room starts to look like a gallery. Keep to a few focal points and let the rest fall into shadow.
Step 5: Match Colour Temperature and Brightness
Keep every bulb in the room within a narrow warm range so the layers look like one scheme. Sources vary slightly, but living rooms generally work best at around 2200K to 3000K. Cooler light above 4000K feels alert and suits desks and kitchens, not evening relaxation.
| Setting | Colour temperature | Effect |
| Very warm | About 2200K-2700K | Candle-like, intimate |
| Warm white | About 2700K-3000K | Cosy, suits most living rooms |
| Neutral to cool | 4000K and above | Crisp, energising, better for work areas |
Mixing a 2700K lamp with a 4000K downlight makes the room look patchy, and fabrics and walls shift colour from one zone to the next. For brightness, a rough planning figure is about 100 to 200 lumens per square metre at full output across all layers. You rarely run at full output, which is why dimmers matter. Look for bulbs with a high colour rendering index, ideally 90 or above, so wood, fabric and art look natural.
Step 6: Split the Circuits and Add Dimmers
Control is what turns separate lights into a real lighting scheme. Group fittings into at least three controls: ambient, accent, and lamps on plug-in dimmers or smart plugs. Then set a few scenes you can switch between quickly. These percentages are starting points, not rules.
| Scene | Ambient | Task | Accent |
| Daytime | Off or low | Off | Off |
| Evening TV | 20-30% | Side lamp low | Low |
| Reading | 30-40% | Reading lamp full | Low |
| Hosting | 50-60% | Off | Full |
Check that dimmers and bulbs are compatible. Mismatched LED bulbs and dimmers cause flicker or a limited dimming range, and this is the most common reason a new scheme disappoints. If you use smart bulbs, leave the wall switch on, as cutting power at the switch makes them lose their connection. A central control system can store scenes and recall them with one touch, but a good set of lamp dimmers does most of the job for much less.
How Much Does a Layered Lighting Scheme Cost?
Most of a layered scheme is plug-in lamps and bulbs, so you can build it in a weekend. Costs rise sharply when you add wiring, chasing into walls or recessed fittings. These ranges are approximate in GBP and vary by country, supplier and electrician rates.
| Item | Approximate cost | Typical time |
| Floor or table lamp | £40-£400 each | Same day |
| Dimmable LED bulbs | £3-£15 each | Same day |
| Smart bulbs | £10-£40 each | Same day |
| Dimmer switch, supplied and fitted | £60-£150 each | Part of a day |
| Plug-in wall sconce | £40-£150 each | Same day |
| Hard-wired wall sconce, fitted | £150-£400 each | 1 day |
| Picture light | £40-£250 each | Same day |
| LED strip for shelves or cove, with fitting | £100-£400 | 1 day |
| Recessed downlights, fitted | £50-£120 each | 1-3 days |
| New lighting circuits | From £500, more if ceilings are opened | Several days, plus redecorating |
As for upkeep, LED bulbs typically last many years, but replace them with the same colour temperature or the room will slowly lose its balance. Keep a spare, dust shades and strips, and note that cheap fabric shades can yellow over time.
Common Layering Mistakes to Avoid
- Ignoring socket positions. Plan lamp spots before decorating, because trailing cables across walkways look bad and trip people up.
- Lamps too small for their shades or tables. A lamp that is out of scale looks lost and gives too little light.
- Lighting only one side of the room. Spread sources around the edges so no wall goes dark.
- One switch for everything. If ambient, task and accent all share a switch, you have not layered anything.
- Choosing fixtures before choosing layers. Decide what each light is for, then pick the fitting.
Conclusion
To layer lighting in a living room for the perfect atmosphere, think in terms of jobs, not fittings. Start with a dimmable ambient base, add task lights where people sit, accent only the few things worth showing off, and keep every bulb warm. Then put each layer on its own control. Most of it can be done with lamps and bulbs for a few hundred pounds, and you can add wired fittings later if you want them.
FAQs
How many light sources should a living room have?
Most designers aim for at least four or five at different heights, spread across all three layers. A small room may manage with fewer, but one ceiling light alone is rarely enough.
Do I still need a ceiling light?
Not always. A room lit entirely by lamps and wall lights can look lovely, but you will want a dimmable overhead option for cleaning and for bright daytime activities.
How do I light a living room with no ceiling light?
Use floor lamps and table lamps for ambient light, add a plug-in sconce or two, and place them in different corners. Keeping lamps at varied heights stops the room feeling flat.
How do I avoid glare when watching TV?
Do not watch in a pitch-dark room, as the contrast tires your eyes. Use low, indirect, dimmable light and keep lamps from reflecting in the screen. A strip behind the TV can soften the contrast.
Can I layer lighting in a rented living room?
Yes. Plug-in sconces, floor lamps, smart plugs and adhesive LED strips need no electrician and leave no damage. Hard-wired changes, such as new dimmers, usually need the landlord’s permission.
What works for a living room with a low ceiling?
Choose flush or semi-flush fittings instead of pendants, and rely more on floor lamps and uplighters. Light bouncing off the ceiling makes it feel higher.
Can I use smart bulbs with a dimmer switch?
Not usually. Smart bulbs dim themselves through an app or hub, and a wall dimmer can interfere with them. Set the wall switch to full on and control the bulbs digitally, or use standard dimmable bulbs with a compatible dimmer.
How do I light a living room that also has a dining area or opens onto a kitchen?
Treat the dining area as its own zone with a pendant or chandelier over the table. Then link the kitchen and living areas with shared accent lighting, such as strips in joinery, so the spaces feel like one scheme.