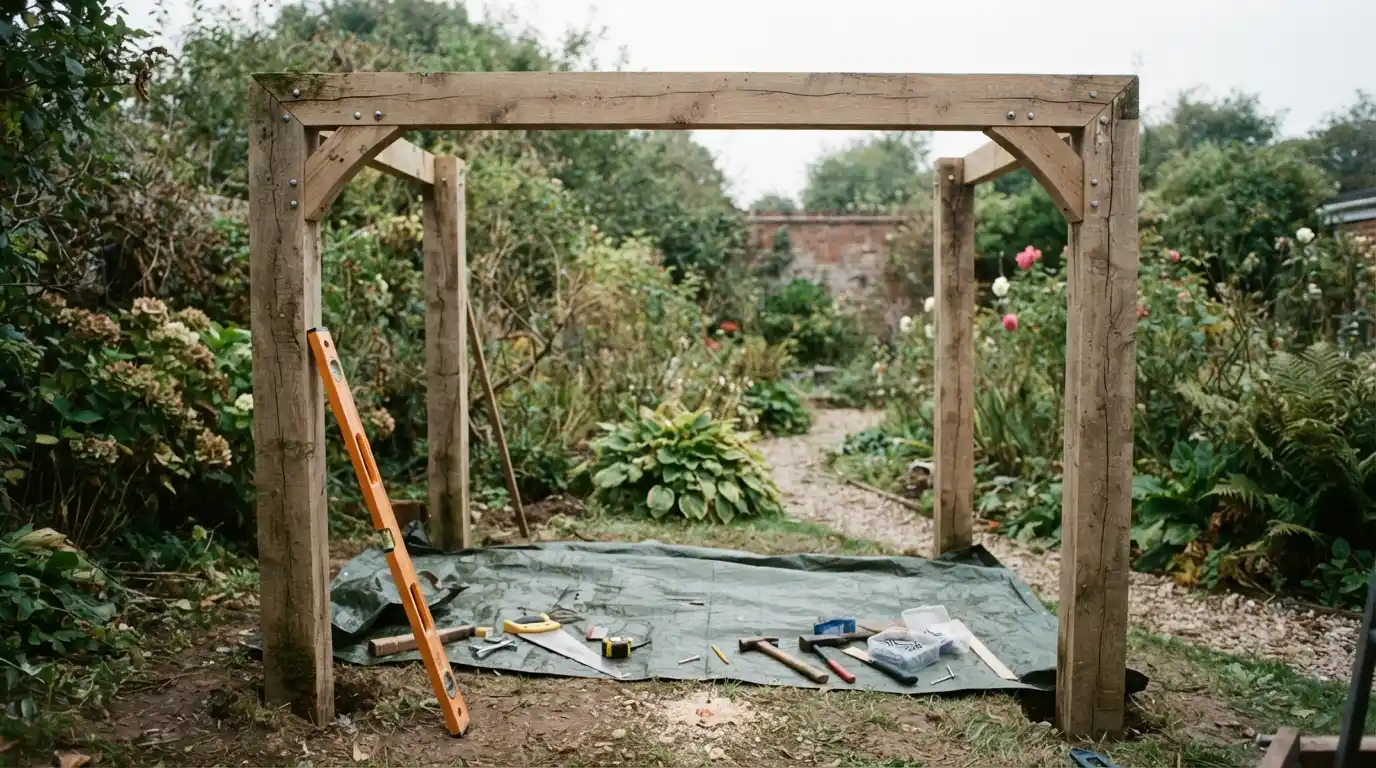
How to Build a Pergola in a Garden

Building a pergola in a garden means setting timber uprights into secure footings, then attaching horizontal beams and rafters on top to form an open frame. Most people building their first pergola get tripped up by two things: not checking planning permission rules before starting, and using post dimensions too small for the structure to actually stay stable once plants and wind load it up.
This guide walks through the actual build process, real post and beam sizing, and the planning rules that catch people out, based on what UK timber merchants, the RHS, and several garden publications currently recommend.
Do You Need Planning Permission to Build a Pergola?
Most garden pergolas fall under permitted development and don’t need planning permission, provided the structure stays under 2.5m in height if it’s within 2m of a boundary, or up to 3m if positioned further than 2m away. A pitched roof design can go up to 4m.
You’ll generally need permission if the pergola covers more than half your garden, sits at the front of the house, or if your property is listed or in a conservation area. If you’re at all unsure, getting a Lawful Development Certificate from your local planning authority before building gives you formal confirmation, and it’s also useful if you sell or remortgage the property later. Rules do vary by country, so if you’re building outside the UK, check your own local planning or zoning requirements before digging a single hole.
How Do You Plan the Layout Before You Start Building?
Planning your pergola layout means deciding on location, size, and ground type before buying any timber, since these three factors determine what fixings and dimensions you’ll actually need. Think about how much sun or shade you want, what the pergola will cover, and how the surface underneath, whether soil, patio, or decking, affects how you set the posts.
Measure the area you’re covering and mark it out with stakes and string line before committing to a final footprint. A useful check here is measuring diagonally corner to corner. If both diagonal measurements match, your layout is properly square. If you’re building over an existing dining table or seating area, measure the furniture first and add clearance space around it so the finished structure doesn’t feel cramped.
What Size Should Pergola Posts and Beams Be?
Pergola posts typically run between 90mm and 150mm square, with a minimum of around 70mm for a small structure and up to 150mm for larger or more exposed builds, while beam height should generally reach around 2.1m to 2.7m to allow climbing plants to trail without blocking passage underneath.
Sources differ somewhat on the finer detail here. The RHS recommends posts of at least 50mm square, ideally 90mm square, supporting crossbeams up to 150mm by 50mm, with lateral rafters around 50mm by 25mm spaced roughly 60cm apart. Gardeners’ World suggests a beam diameter closer to 120mm for a pergola in the 2.2m to 2.5m height range, with cross beams spaced 1.5m to 3m apart. Post spacing between rows can run anywhere from under a metre up to around 3.7m depending on the design, though most UK timber suppliers work within a tighter 1.8m to 3m range for a standard DIY build. If you’re unsure which end of these ranges to use, go larger rather than smaller. An oversized post is a wasted cost; an undersized one is a structural problem once the timber is fully loaded with plants, rain, and wind.
| Element | Typical Size Range | Notes |
| Post thickness | 90mm–150mm square | Larger for taller or more exposed pergolas |
| Post height | 2.1m–2.7m | RHS recommends nearer 2.7m so climbers can trail freely |
| Post spacing (within a row) | 1.8m–3m | Can extend up to 3.7m on larger designs |
| Post depth into ground | 450mm–600mm | Deeper for taller or freestanding structures |
| Crossbeam size | Up to 150mm x 50mm | Matched to post thickness |
| Rafter/lateral spacing | Around 600mm apart | Tighter spacing gives more shade |
Which Timber Should You Use for a Pergola?
Larch, Douglas fir, and oak are consistently recommended as the strongest and longest-lasting timber choices for a pergola, while pressure-treated softwood offers a cheaper, widely available alternative that needs more frequent maintenance to avoid rot.
Oak in particular gets singled out by garden designers as both a strong aesthetic and ecological choice, since it weathers well and can last for decades with minimal upkeep. Pine is available and inexpensive but rots noticeably faster than these alternatives if it isn’t properly treated and re-treated over time. If budget is the main driver, painted or stained softwood is a reasonable middle ground, though be aware it has a shorter lifespan than an untreated oak structure and needs repainting periodically to stay protected, and bird droppings can mark painted finishes more visibly than natural wood. Metal pergolas, typically aluminium or steel, offer a lower-maintenance alternative to any timber option, though louvred metal roofs and internal gutters can clog with fallen leaves near trees, adding a different kind of upkeep.
How Do You Set and Secure the Posts?
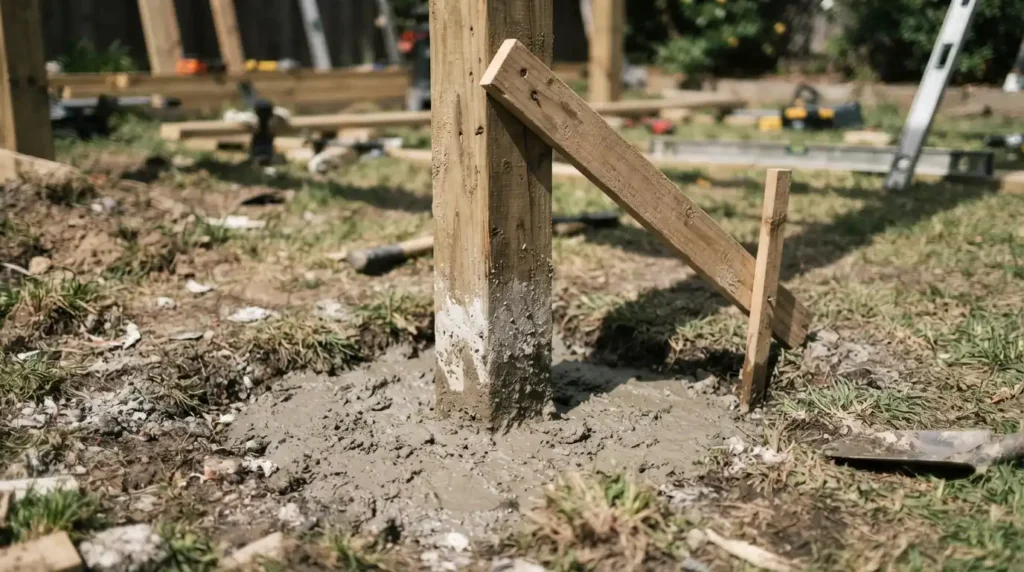
Setting pergola posts securely means either digging holes and setting them in concrete for a soil or grass base, or fixing bolt-down post bases for a patio, decking, or paved surface, with post holes typically dug 450mm to 600mm deep depending on height and ground conditions.
For a concrete-set post, place the post in the hole, check it’s vertical on every side with a spirit level, brace it temporarily with scrap wood, then pour concrete around it and recheck the level before it sets. Let the concrete cure fully before adding any weight to the post. For patio or decking installations, fix bolt-down post bases first using masonry-rated anchors, then attach and level each post afterward. If you’d rather avoid concrete altogether, heavy-duty metal post anchors that bolt directly into decking or patio surfaces work well, and ground spikes are a viable option for softer soil, though neither offers quite the same rigidity as a properly set concrete footing for a taller or more exposed structure.
How Do You Attach the Beams and Build the Frame?
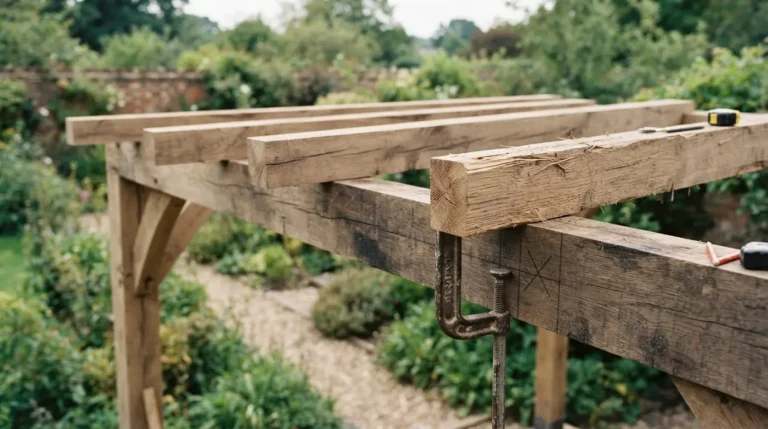
Attaching pergola beams means lifting the main horizontal beams into position across the tops of the posts, checking everything is level, then securing with exterior-grade screws or bolts, a job that’s considerably easier and safer with two people rather than one.
Mitring the beam ends at 45 degrees before fitting corner brackets gives a cleaner finish than a simple butt joint, and using a mallet to help slide brackets into place before final fixing makes assembly noticeably smoother. Once the main frame is up and checked for level, add the rafters across the top, spacing them evenly, typically with decorative shaped ends if you want a more finished look. Corner braces are worth adding at this stage too, particularly for taller pergolas or ones in exposed, windy positions, since they meaningfully reduce movement in the finished structure.
What Are the Most Common Pergola Building Mistakes?
The most common pergola building mistakes are rushing the initial measuring and marking stage, using indoor-rated fixings that rust outdoors, and skipping wood treatment, all of which cause problems that surface months or years after the build rather than immediately.
Uneven post spacing or a frame that isn’t properly square almost always traces back to skipping the diagonal measurement check at the layout stage. Posts that lean even slightly throw off the whole structure, which is why bracing them temporarily while the concrete or fixings set matters more than it might seem. Using standard interior screws instead of exterior-grade fixings leads to visible rust within a season, and skipping timber treatment before or immediately after building shortens the pergola’s lifespan considerably, particularly in the UK’s wetter climate. Finally, underestimating wind loading on a tall or exposed pergola is a real risk. Corner braces and properly anchored posts matter more here than most first-time builders expect.
Can You Build a Pergola on Uneven Ground or a Slope?
Yes, a pergola can be built on uneven ground either by levelling individual footings before setting the posts, or by cutting the upright posts to different lengths to compensate for the slope while keeping the beam line level across the top.
This is a case where getting the ground assessment right before cutting any timber saves considerable rework later, since adjusting post height after the frame is partially assembled is far more difficult than planning for it from the start.
What Plants Work Best on a Pergola?

Vigorous, non-clinging climbers like roses, wisteria, clematis, and honeysuckle are the classic choices for a pergola, chosen for their ability to be trained up posts and across the roof frame to create shade and fragrance through the growing season.
Rambling and climbing roses suit pergolas particularly well since their long, flexible stems train easily along a support frame, and repeat-flowering varieties extend the display over several weeks. Clematis works well too, though it’s worth choosing a Group 1 or Group 2 variety rather than Group 3, since Group 3 types need cutting back to ground level every year, which isn’t ideal if you want a plant that covers the structure permanently. Wisteria delivers a dramatic spring and early summer display but needs pruning twice a year and takes a couple of seasons to establish properly. If you’d rather skip planting altogether, a retractable canopy or shade sail gives you sun protection with none of the ongoing care that climbing plants demand.
Conclusion
Building a pergola in a garden comes down to getting three things right: checking your local planning rules before you start, sizing your posts and beams properly for the height and exposure of your structure, and using timber and fixings rated for outdoor use from day one. Oak, larch, or Douglas fir will outlast treated softwood with less ongoing care, and taking the time to square up your layout and brace your posts while fixings set will save you far more effort than any shortcut at the start. Get the foundations and frame right, and the finishing touches, whether that’s climbing roses, a coat of paint, or string lights across the beams, are the easy part.
FAQs
Can I build a pergola on paving slabs?
Yes, using secure bolt-down post bases and strong masonry fixings, provided the slabs themselves are stable enough to support the load.
How deep should pergola posts be set?
Around 450mm to 600mm is typical, though exact depth depends on the pergola’s height and the ground conditions it’s being built on.
Is it cheaper to build a pergola or buy a kit?
A simple wooden pergola is often cheaper to build yourself if you source materials carefully, while a fully-featured aluminium pergola with smart features like motorised louvres is usually more cost-effective to buy ready-made.
How do I make my pergola more stable in wind?
Use strong anchors or concrete footings, add corner braces, and choose thicker posts for larger structures, since wind loading increases significantly with height and surface area.
What’s the difference between a pergola and a gazebo?
A pergola is typically square or rectangular with an open, beam-and-post structure often attached to a building, while a gazebo is usually freestanding, often round or octagonal, with a closed, domed roof.
Can I build a pergola without using concrete?
Yes, heavy-duty metal post anchors bolted to decking or patio, or ground spikes for soil, both work as alternatives, though neither is quite as rigid as a properly set concrete footing.