
How to Create a Media Wall in Your Living Room

A media wall turns the television area into a neat, built-in feature that hides cables and adds storage. In UK living rooms it works best when you plan the structure around the screen size, the wall construction and everyday access. This guide covers the practical steps from measuring to finishing so the wall looks intentional and functions well.
Assess the Wall and Room Layout
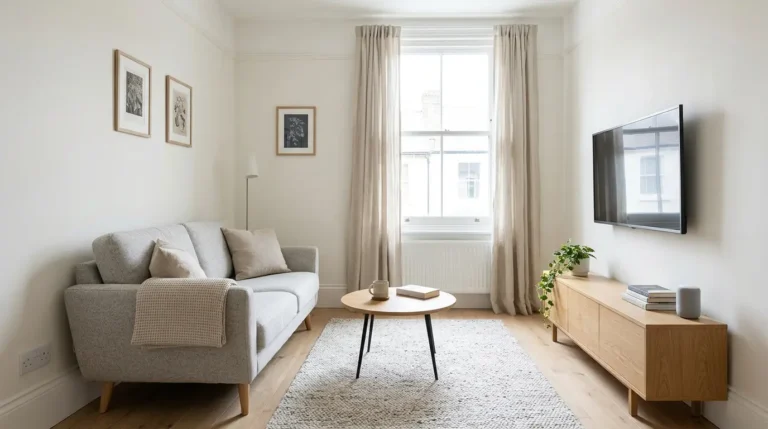
Check whether the wall is solid brick, block or stud. Solid walls take heavier fixings more easily. Note the position of sockets, light switches and any radiators. A media wall typically needs 2.4–3.0 metres of clear wall length for a balanced look with a 55–65 inch screen. Leave at least 300 mm clear on each side so the feature does not feel squeezed against doorways.
Measure from floor to ceiling and note any coving or picture rails. Most media walls sit between 2.2 m and 2.4 m high so they do not clash with ceiling details. Confirm the sofa viewing distance is at least 2.5 times the screen diagonal for comfortable watching.
In older UK properties, check for any damp or uneven plaster before fixing battens. A media wall can hide minor wall imperfections, but serious damp needs fixing first. Note the position of any existing picture hooks or shelves that will need removing. If the room has a chimney breast, the media wall can sit to one side or span across it depending on the available width.
Consider the room’s traffic flow. The media wall should not block a main doorway or the path to a window. Leave at least 900 mm clear in front of the finished wall so people can move past the sofa comfortably.
Decide which items need to be hidden and which can stay open. Closed cupboards hide games consoles and cables. Open niches hold books or decorative objects. Leave 50–80 mm ventilation space behind closed sections that contain electronics. A common layout places the television in the centre with storage on both sides.
Include cable channels that run from the television down to the floor or to a nearby socket. Plan for future upgrades so you can add devices without dismantling the wall.
Include at least one full-height cupboard for larger items such as a games console or sound system. Open shelves work better at eye level so you do not have to bend to reach everyday objects. Measure the depth of any devices you plan to store so the shelves are deep enough without protruding too far into the room.
If you want a floating media wall, the support frame must be fixed solidly and the weight calculated carefully. Many ready-made systems come with specific fixing instructions for different wall types. Always follow the manufacturer’s load ratings.
MDF is the most common material for DIY media walls because it cuts cleanly and takes paint well. Use 18 mm MDF for shelves and carcasses so they stay rigid. Solid timber or veneered panels add warmth but cost more and need careful finishing. Acoustic panels or slats can cover the wall surface and improve sound while hiding the structure.
Paint the finished wall in a colour that matches or contrasts with the rest of the room. Matte finishes reduce glare on the screen. If you add LED backlighting, choose a low-voltage system and route the driver out of sight.
When painting, use a primer first if the MDF is raw. Two top coats of a durable emulsion or specialist furniture paint give a hard-wearing finish. If you choose a dark colour, test it in the room under both daylight and evening lighting because dark shades can make the wall feel closer. Acoustic slat panels are popular because they add texture and help with sound without needing a full plaster finish.
Edge banding or painted trim covers the cut edges of MDF so they do not show. Match the trim colour to the main panels for a seamless look. If the media wall includes glass doors, choose toughened glass and soft-close hinges for safety and quiet operation.
Fix a timber frame or battens to the wall first if you are building from scratch. Use appropriate wall plugs for the wall type and check levels at every stage. For a floating look, the frame can sit 50–100 mm off the wall so cables run behind. If you buy a ready-made media wall, confirm the fixing points match your wall construction.
Install the television bracket before closing in the structure so you can access the fixings. Most brackets need the screen centre at seated eye height. Leave service access panels or removable sections so you can reach cables later.
Finish Lighting, Cables and Details
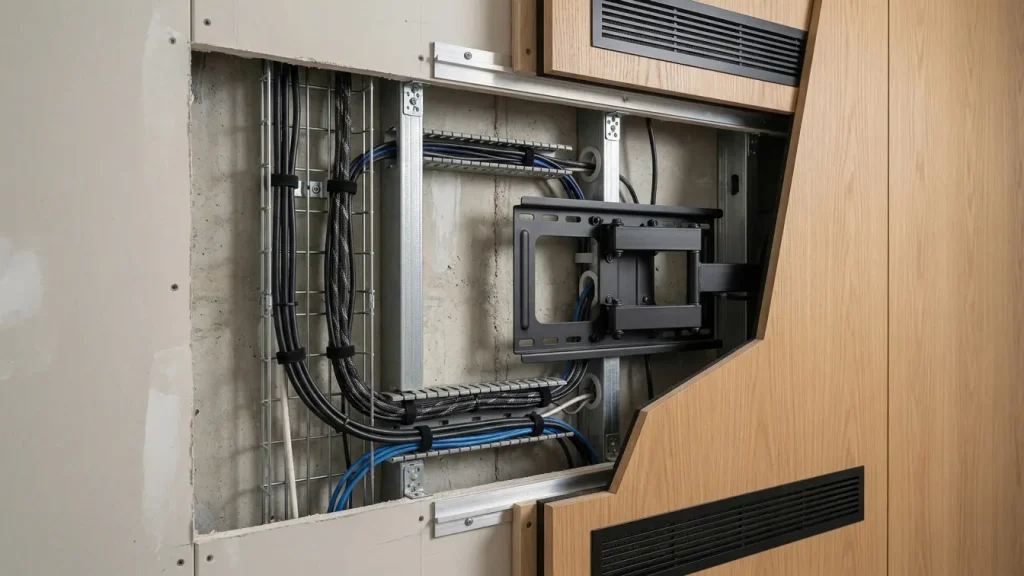
Route all cables through the planned channels before the final panels go on. Label each cable. Add a power strip inside a ventilated cupboard if several devices need sockets. LED strips behind the television or under shelves create a soft glow without reflecting on the screen.
Finish edges with matching trim or paint so the wall looks built-in rather than added on. Check that cupboard doors open fully without hitting furniture. A common mistake is forgetting ventilation, which can cause electronics to overheat.
After the structure is fixed, check every shelf is level and every door opens without binding. Adjust hinges if needed before the final paint or finish. If you are adding a soundbar, confirm it fits in the allocated niche and that the infrared signal from the remote can still reach the devices. Some media walls include a small access door at the bottom for easy cable changes later.
Once complete, style the open shelves with a few carefully chosen objects rather than filling every space. This keeps the focus on the television and the clean lines of the wall.
Creating a media wall succeeds when you measure the wall, plan storage and ventilation, and leave clear access for cables. Choose materials that suit the room and finish the edges so the feature looks intentional. The result is a tidy living room that keeps the television as the focus without visible clutter.
FAQs
How wide should a media wall be?
A media wall usually needs 2.4–3.0 metres of clear wall length to look balanced with a standard living room television. Leave at least 300 mm clear on each side.
Can I build a media wall on a stud wall?
Yes, if you fix into the studs or use suitable plasterboard anchors rated for the weight of the structure and television. Check the wall construction first.
Do I need ventilation in a media wall?
Yes. Leave 50–80 mm clear space behind closed sections that contain electronics so heat can escape. Open backs or ventilation slots also help.
What is the best material for a DIY media wall?
18 mm MDF is practical for most DIY builds because it cuts cleanly and paints well. Solid timber adds warmth but needs more careful finishing.
How high should the television sit in a media wall?
The centre of the screen should sit at seated eye level. Most installations place this between 400 mm and 600 mm from the floor depending on sofa height.
Can I add lighting to a media wall?
Yes. Low-voltage LED strips behind the television or under shelves work well. Route the driver out of sight and avoid placing lights where they reflect directly on the screen.